Eckler's Catalogs Available Now!
1955-57 Rear Coil-Over Shock and Tapered Leaf Spring Conversion
We all want our classics to still look like a classic, but to handle like a new car so we add disc brakes, steering, anti-sway bars and more! The rear suspension on a Tri-Five consists of two leaf springs and a of hydraulic shocks just like what they used in the horse and buggy days. You can upgrade the rear suspension with firmer leaf springs and gas charged shocks, but you are still working with 1800's engineering. Installing a complete independent rear suspension (Corvette) is a huge undertaking and will require major frame and sheet metal modifications, not to mention a huge expense.
Another option is to install a modern chassis like the fine Morrison units we carry, yet not everyone wants to spend 15,000 to upgrade their chassis. Classic Chevy has developed a new coil-over shock conversion especially engineered for your '55-'57. It is not a universal street rod kit that must be adapted onto your classic, but a complete turn-key conversion that has been designed to fit the Tri-Five chassis only.
The kit uses a of special tapered leaf springs as trailing arms to locate the rear end. These tapered springs attach to the frame using the stock front leaf spring mounting brackets. The coil-over shocks support the weight of the rear of the car and a bar connects from the rear axle housing to the frame to control lateral movement. You may also and install our adjustable traction bars to complete this fantastic kit. This kit can be used with the springs in the stock location or with the CCI Spring Pocket Kit PIN 21-131. After installing this kit the car will handle and corner tar better, will be fully adjustable and will have a super custom look! With the back half of the rear leaf spring deleted there is of room tor larger tailpipes and different gas tank options as well.
Parts List
- 57-175138-1 1955-57 1-Piece Frame Stock Height Rear Coil-Over Shock Conversion
- 57-175139-1 1955-57 2-Piece Frame Stock Height Rear Coil-Over Shock Conversion
- 57-175140-1 1955-57 1-Piece Frame 2" Drop Rear Coil-Over Shock Conversion
- 57-175141-1 1955-57 2-Piece Frame 2" Drop Rear Coil-Over Shock Conversion
- 57-133254-1 1955-57 Traction Bar Kit Use With Leaf Springs In Stock Location
- 57-133262-1 1955-57 Traction Bar Kit Use With Rear Sping Pocket Kit
- 57-133228-1 1955-1957 Chevy Rear Spring Pocket Kit to add bigger wheels and tires
Tools Needed
- Floor Jack
- Jack Stands
- Drill and 3/8" Drill Bit
- 9/16" Wrench
- 3/4" Wrench
- Welder
Time Frame: 6 Hours
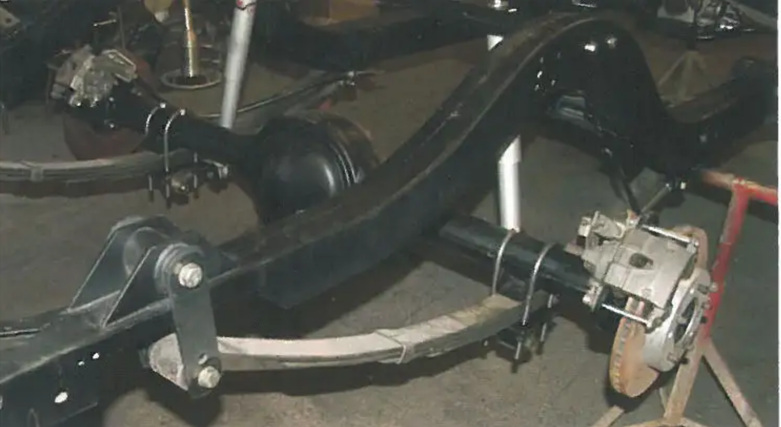
Image 1: The rear end in a Tri-Five is mounted to the rear frame using two multi-leaf springs. Originally they were available in four, five or six leaf designs depending on the car model. The springs were originally mounted outboard of the frame rails. Our display frame has had the rear spring kit installed which mounts the leaf springs with the frame allowing for wider tires.
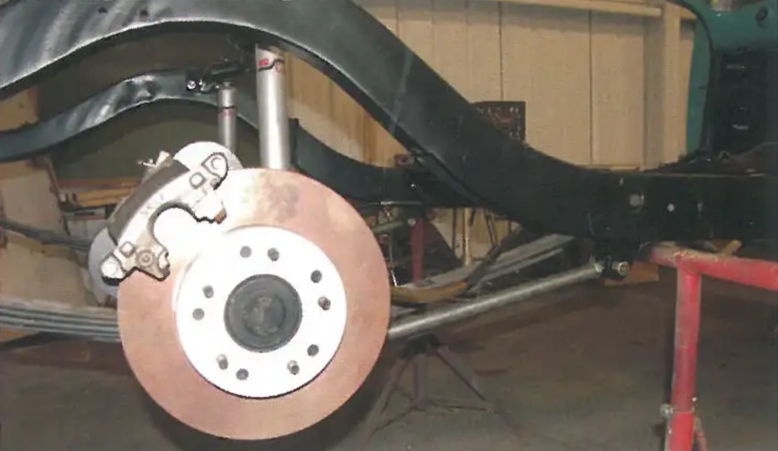
Image 2: Our display frame has also had the rear traction bar kit PN 57-133262-1 installed (refer to March 2006 Classic Chevy Magazine). The traction bars bolt to a that is held to the bottom of the lower shock using the rear end U-bolts and to a bracket that is welded to the frame at the front of the leaf spring.
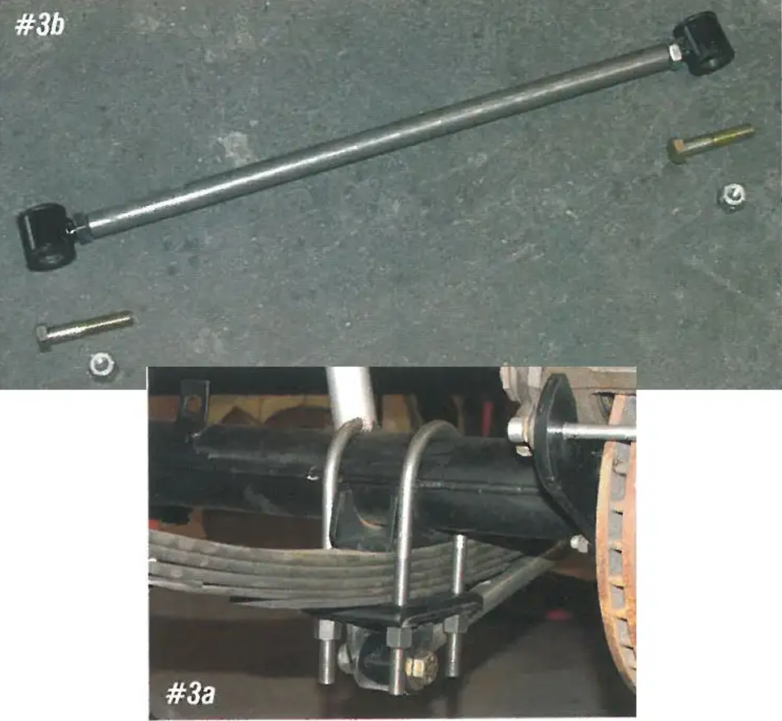
Image 3: First the car on jack stands with the stands under the frame and not the rear end housing. If the car has the CCI traction bars, they will need to be removed first by removing the front and rear mounting bolts for the traction bars.
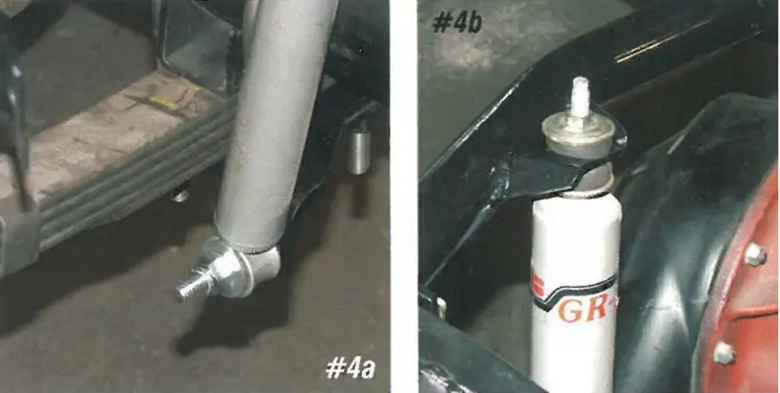
Image 4: Remove the shock absorbers by removing the 3/4" nuts and flat washers from the lower shock The top of the shock is bolted to the shock bar or the trunk flood board with a 9/16" nut. Remove this hardware as well.

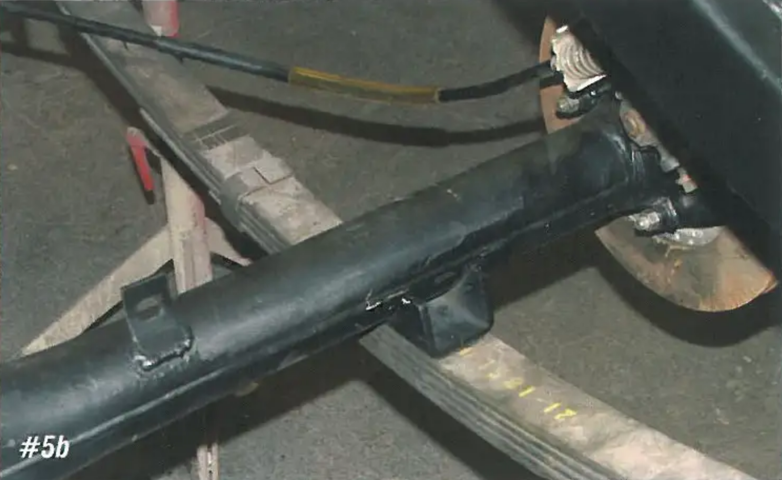
Image 5: There are two U-bolts on each side of the car that hold the rear end to the leaf springs. Remove the four 3/4" U-bolt nuts from each side. Now the lower shock (and rear traction bar) can be removed.
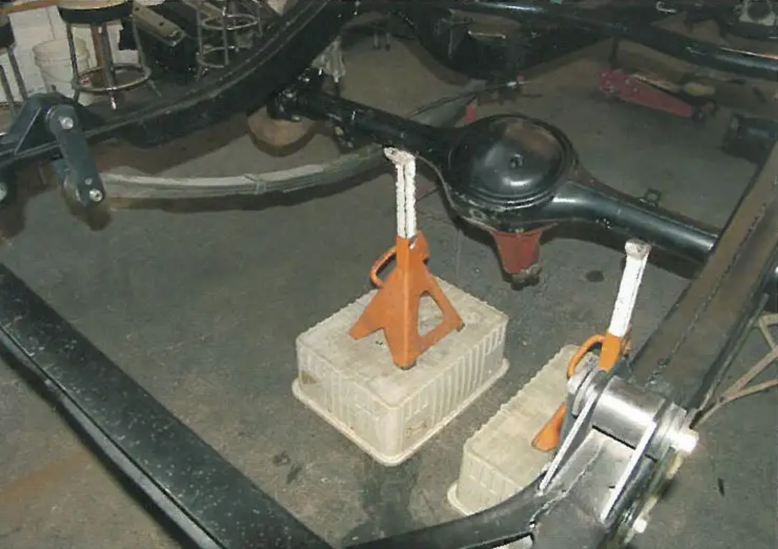
Image 6: With the U-bolts removed, raise the rear end up off the stock leaf springs using a floor jack.
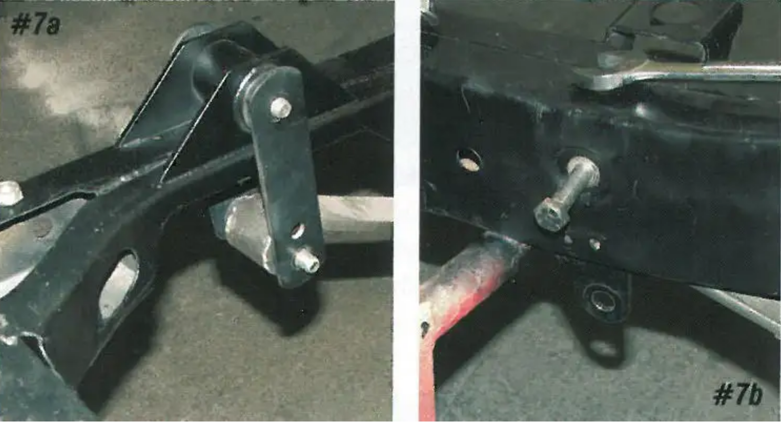
Image 7: Now remove the rear shackles and the front leaf spring eye bolts so the leaf springs can be removed.
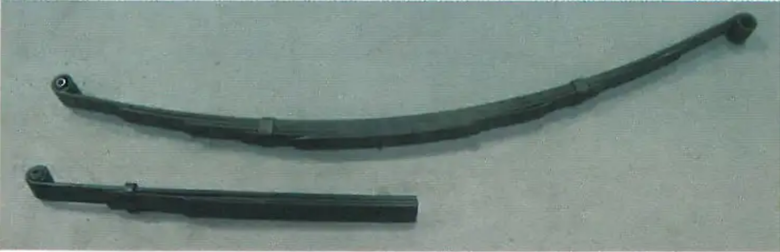
Image 8: Our tapered leaf spring is basically the front half of a rear leaf spring yet is made out of a much heavier material and fewer leaves. There are only three leaves in the new tapered leaf springs, which will work as lower control arms for the rear end.
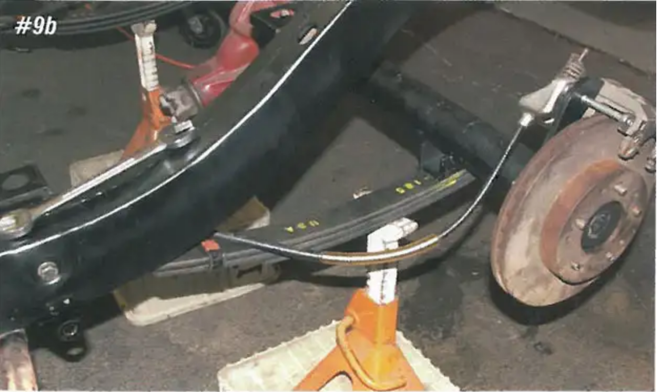
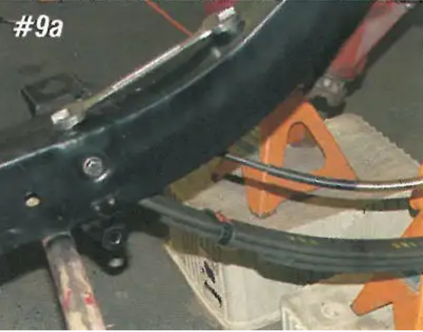
Image 9: The front of the tapered leaf springs include the stock front spring eye bushings allowing the tapered leaf springs to mount to the stock front spring mounts or to the spring conversion mounts.
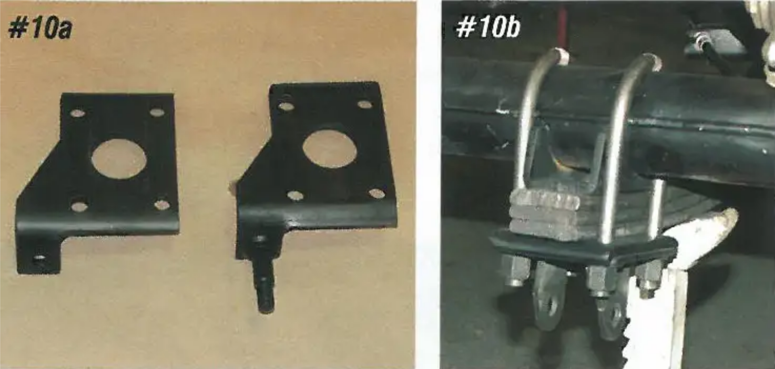
Image 10: The rear end is now held to the new tapered springs with four new U-bolts and new lower shock The holes in the rear axle spring fit onto the spring center on the tapered leaf springs just like the original springs. This will maintain the correct angle. The new lower shock brackets are made of much heavier steel using a bolt, spacer, washer and nut to hold the bottom of the coil-over shock in. Torque the U-bolt nuts to 65 lbs.
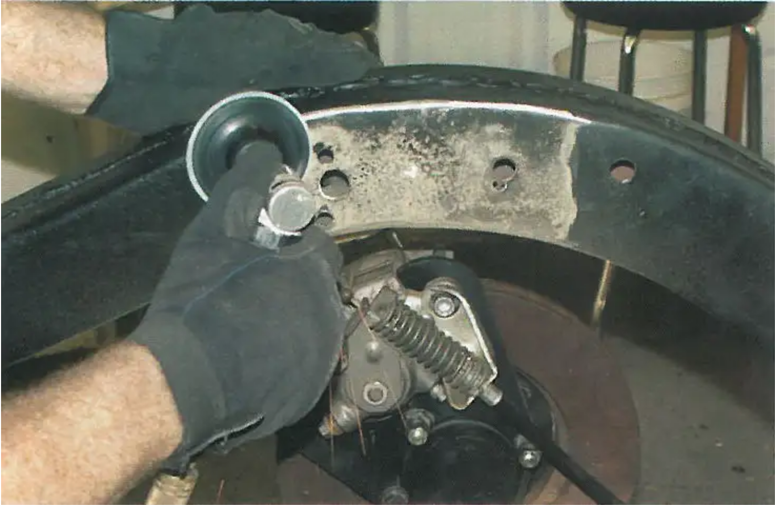
Image 11: The new shock bar that comes with the coil-over shock conversion must be welded to the frame for needed strength. The new shock bar has the same end flanges as the non coil-over shock bar so it can be bolted in for locating only: Once the location is determined for the new shock bar, the frame must be cleaned for welding.
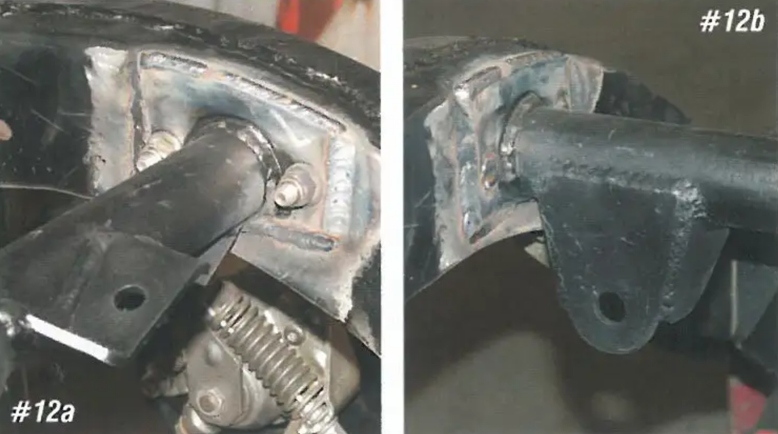
Image 12: The new shock bar mounts with the upper shock brackets to the front of the crossmember and the bar bracket oriented to the rear on the driver's side.
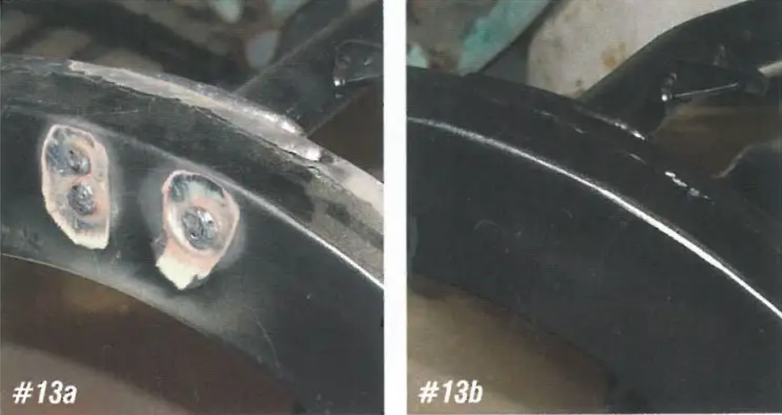
Image 13: Once the shock crossmember is welded in, remove the mounting bolts and weld up the locating holes in the frame.
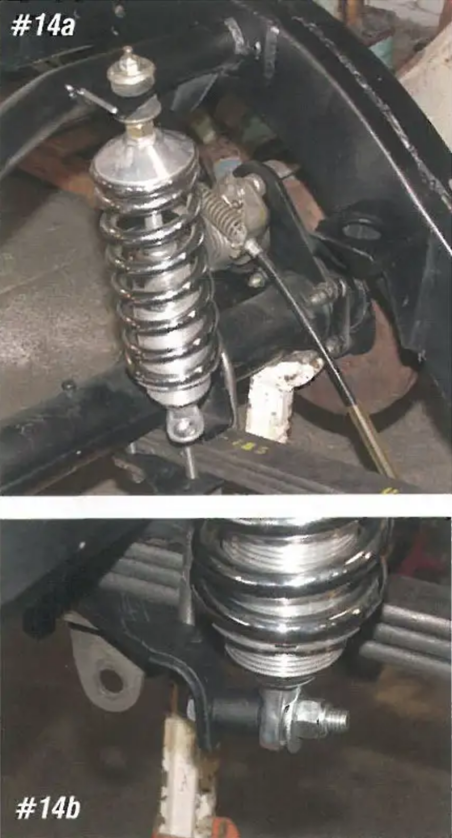
Image 14: Now it's time to on the stuff! The top of the coil-over shocks attach to the upper shock bar using a stud, rubber grommets, washers and nuts just like the stock shocks. The bottom of the coil-over shocks have 1/2" spherical rod ends that attach to the new lower shock using 1/2" x 2" bolts and nuts with a 1" spacer between the rod ends and shock.
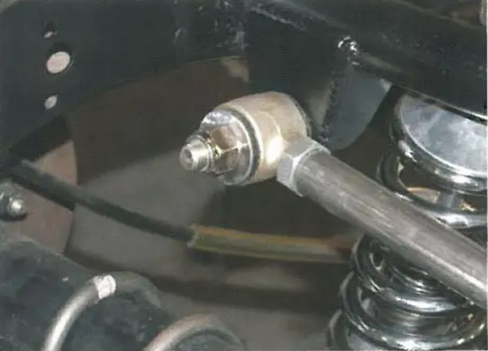
Image 15: Next the bar needs to be installed. The bar connects from the shock bar to the rear end to keep the rear end from moving laterally: The bar has screw-in rod ends with urethane bushings on each end. The driver's side of the bar attaches to the bracket on the back side of the new shock bar with a 1/2 x 2" bolt with a flat washer and lock nut.
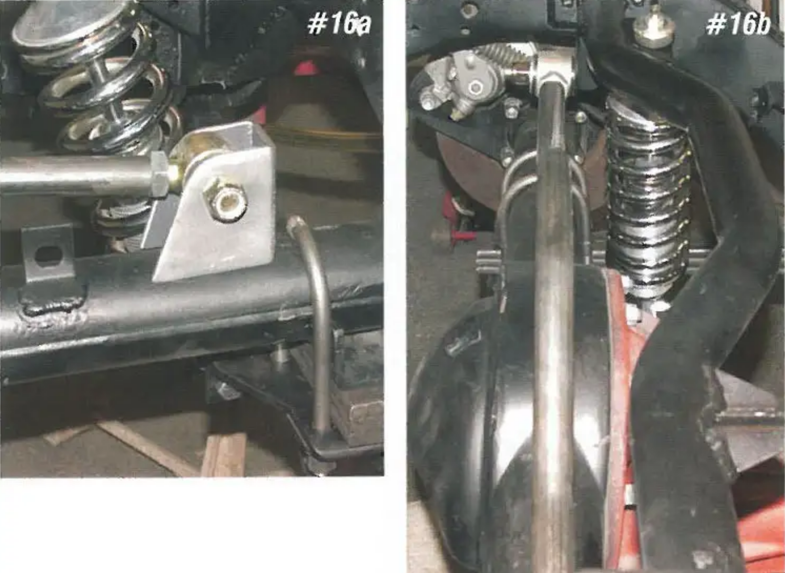
Image 16: The Lower bar bracket must be welded to the top of the rear axle tube on the side. With the bar bolted to the new shock crossmember and the axle housing bracket bolted to the lower end of the bar, the bar will over the center of the axle housing and to the side. Support the rear end with a jack and jack stands so it is supported at the ride height.
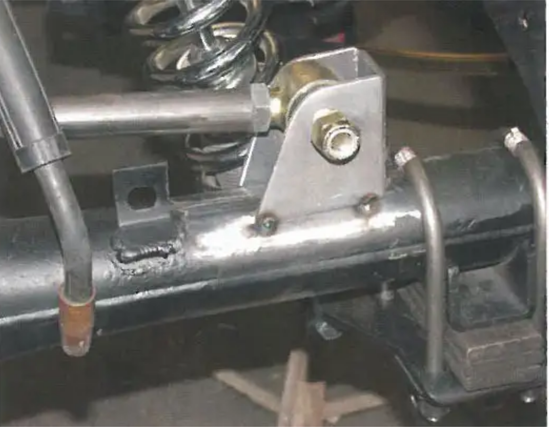
Image 17: Adjust the threaded ends on the bar so that 1/4" of threads appear above the jam nuts at the ends of the bar. This will center the adjustment on the bar so it can be adjusted either direction once the welding is complete. The bends in the bar will clear the rear end housing as well as dual exhaust tailpipes. From front to rear the bar should be centered over the axle housing. Weld the bracket to the rear end axle tube.
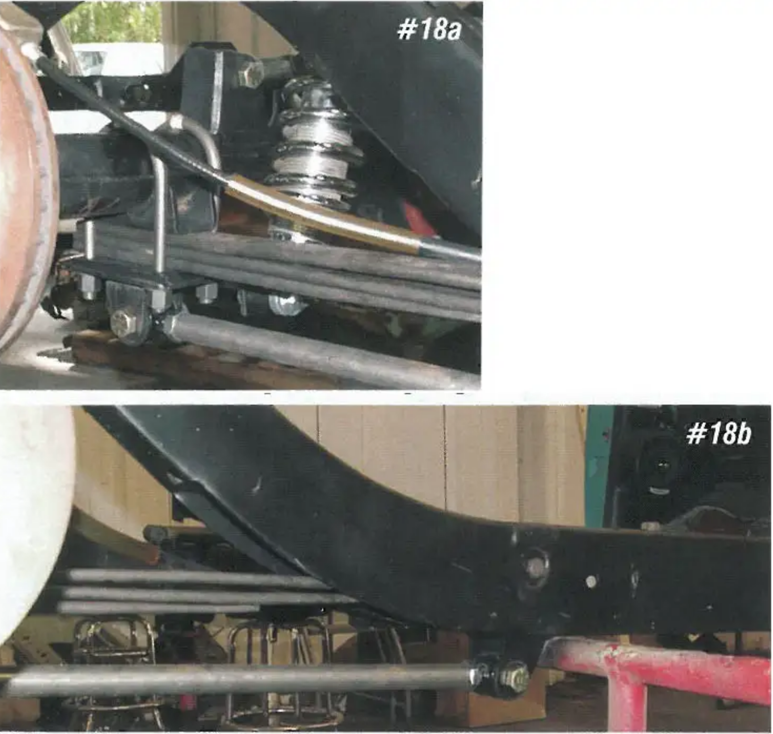
Image 18: The front brackets for the traction bars weld to the frame just under the front spring eye if the car has the spring kit. If the car has the leaf springs in the stock location, the front brackets weld to the stock front spring eye bracket on the outboard side of the frame. The rear bracket for the traction bars is held to the bottom of the lower shock using the four U-bolt nuts and flat washers that hold the rear end to the new tapered leaf spring.

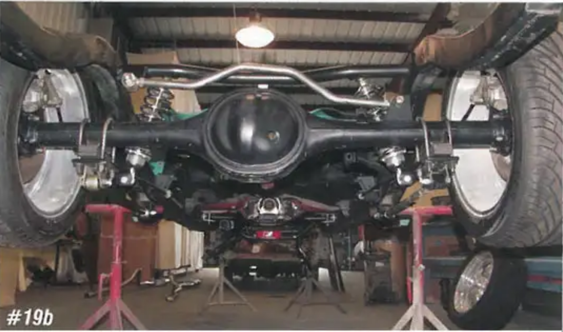
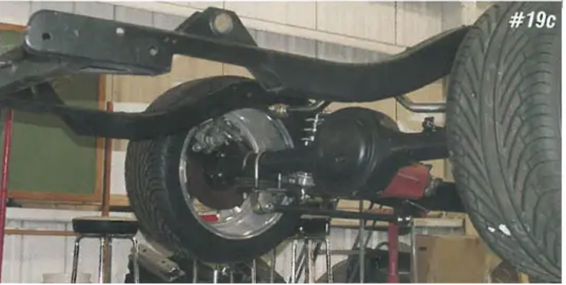
Image 19: The coil-over shock conversion gives the rear end under the car a great look and leaves of room for large dual exhaust tailpipes and custom gas tanks.

Image 20: When ordering the coil-over shock-tapered leaf spring conversions, they can be ordered in four versions; stock height coil-overs, 2" lowering coil-overs for 1 and 2-piece frames and the same kits for use with the rear spring kit. The coil-over shocks are fully adjustable, so by using the supplied spanner wrench, the spanner nut on the bottom of the coil spring can be turned up or down to raise the car 1" or lower the car 1".