Eckler's Catalogs Available Now!
Talk to a Corvette Sales Tech
1-610-990-4558
M-F 8:30A-11P ET, Sat-Sun 8:30A-9P ET
1955-57 Tremec 5-speed Transmission Installation
When it comes down to transmission choices for classics today, the tide is "shifting". It wasn't long ago that all custom cars had been converted to TH700R4 automatic. Great mileage, no need to shift, easy to install, these overdrive automatics are the hot lick. With the return of the popularity of the muscle car, manual transmissions are back in. But not the old crunchy 4-speeds we grew up with; brand new 5-speeds are in! The joy of banging gears and feeling the torque of a healthy small or big block has never been so smooth or fun as it is now with a modern aftermarket manual transmission like the Tremec. The all-new Tremec 5-speed transmission is the way to go. The TKO 600 series transmission is plenty strong enough for any small or big block VB. With a low 2.9:1 first gear, the car will really get up and go at those traffic lights. Once you get out on the open road and shift the transmission into 5th gear, there is a 36% reduction in RPM's versus a non-overdrive transmission with a 1:1 final drive ratio. Mechanical and hydraulic clutch installations have been covered in previous issues and will not be covered here.
Parts List
- 1955-1957 Chevy 5-Speed Transmission Tremec TKO600
Tools Needed:
- 9/16" Socket w/ Ratchet
- 15 mm Socket
- 5/16" Nut Driver
- Electric Drill
Time Frame
- 5 Hours
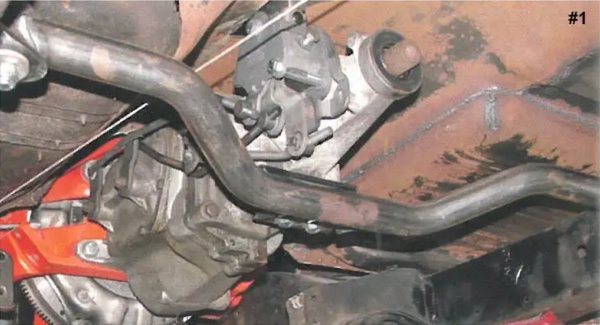
Image #1: Any Muncie, Saginaw or T-10 4-speed transmission has the same bellhousing bolt pattern as the original 3-speed transmission. This allows a 4-speed transmission to be installed using a stock bellhousing. Here we have a Muncie 4-speed installed with the CCI tubular transmission crossmember PIN 57-132240-1.
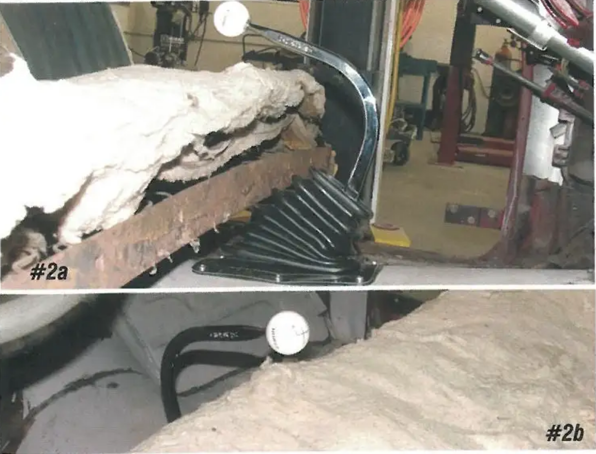
Image #2: Hurst shifter PIN 208-01 works well with a Muncie, Saginaw or T-10 transmission and the stock bench seat.
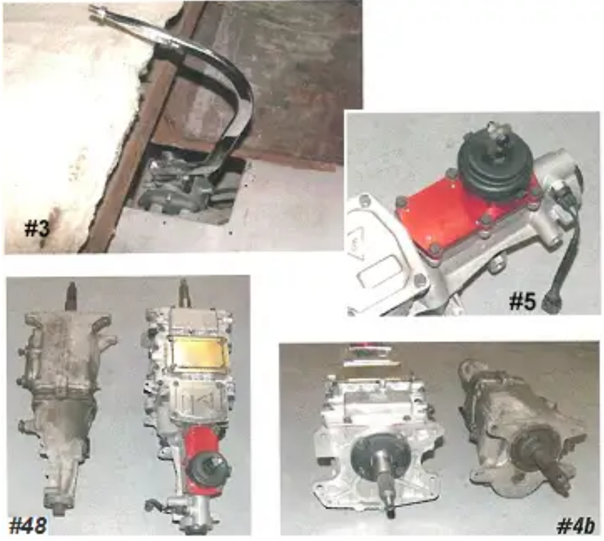
Image #3: In order to install a floor shifter in a '55-'57, it is necessary to cut a hole in the floor. Sometimes you are lucky enough to have a hole that was cut neatly, but many times it looks like someone did it with a chain saw!
Image #4a & 4b: The Tremec transmission is 1-3/4" longer than the Muncie transmission, so once the installation is complete, the driveshaft will need to be shortened accordingly. The Tremec has the same bellhousing bolt pattern as the Muncie so it is compatible with a stock Tri-Five bellhousing. The old cast iron manual transmission bellhousing is a bit archaic so we will use an all-new aluminum bellhousing.
Image #5: The Tremec transmission is a "top-loader" type transmission with the shifter base protruding out the top of the transmission case. This design gives far better shifting action than the old linkage type transmissions and is far more durable.
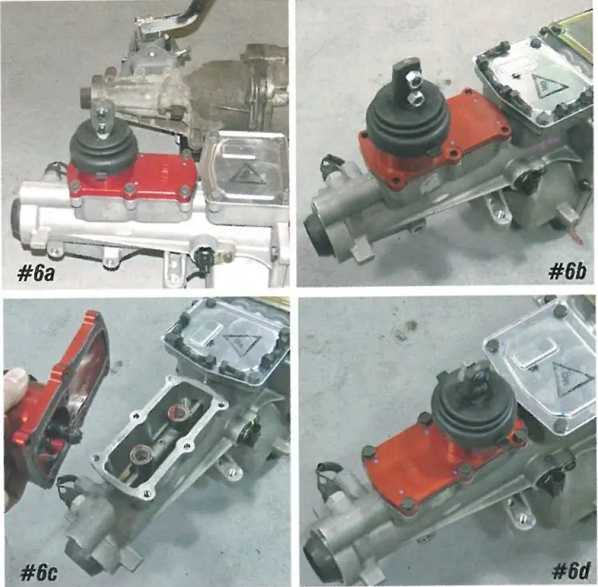
Image #6a, 6b, 6c & 6d: When delivered, the shifter on the Tremec is in the rear-most position on the transmission. For a 1955-57 installation, the shifter base must be moved to the forward position. Remove the six bolts that hold the shifter plate to the top of the transmission case, and remove the shifter base from the transmission. Rotate the shifter base 180 degrees so that it is oriented toward the front. Clean the base of the shifter with a rag and apply a small amount of gasket sealer and reinstall.
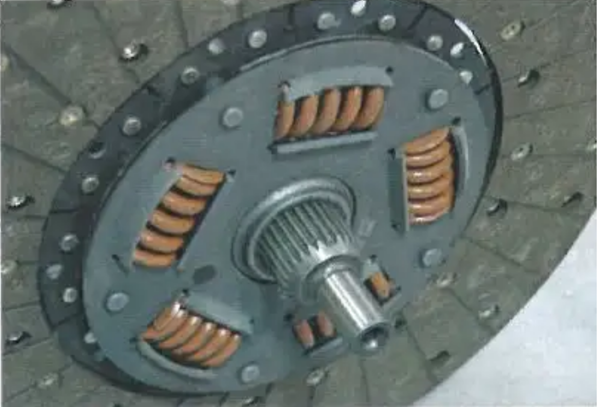
Image #7: The input shaft (front) on a Tremec transmission has 26 splines. Make sure to get a clutch disc that matches the splines correctly.

Image #8: Our engine is going to be side-mounted, so the rear bellhousing mounts can be eliminated. Install the new aluminum bellhousing PIN 571719981.
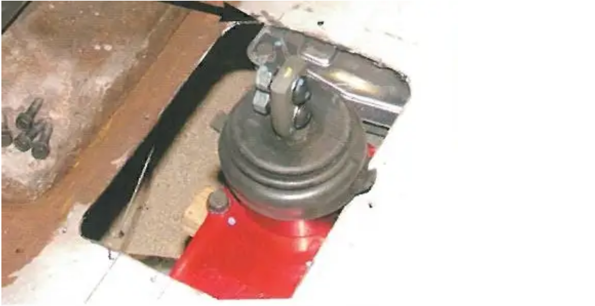
Image #9: The center of the output shaft (rear) on the transmission must measure 6" up from the bottom of the frame to keep the proper driveshaft alignment and pinion angle. Depending on the exact location and condition of the transmission hump and the condition of the body mounts, the top transmission will most likely touch and bind with the transmission floor tunnel. If your car has a hole for a four-speed cut already, it must be modified to accept the top-loader style of the Tremec.
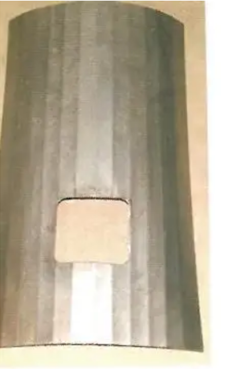
Image #10: A new steel transmission tunnel repair panel PIN 57-175588-1 has been designed specially for this installation to raise the tunnel area to clear the Tremec transmission and repair a previously butchered floor as well.
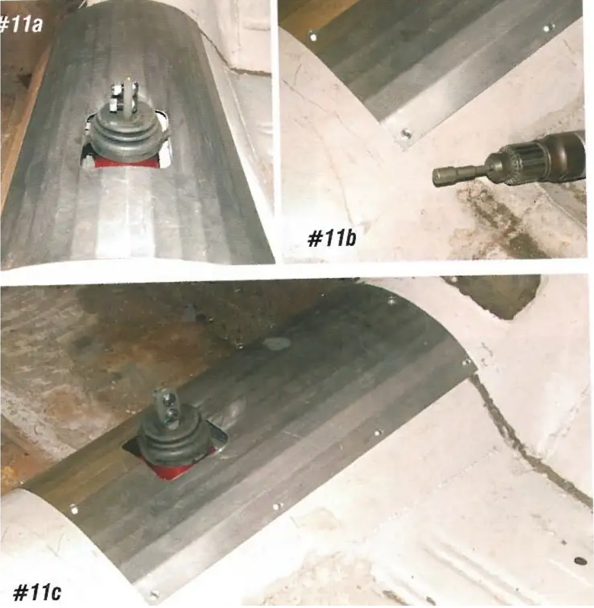
Image #11a, 11b & 11c: The new panel may be welded to the floor or attached with the supplied #8 tech screws. Place the panel over the new shifter so that the shifter base is centered in the hole.
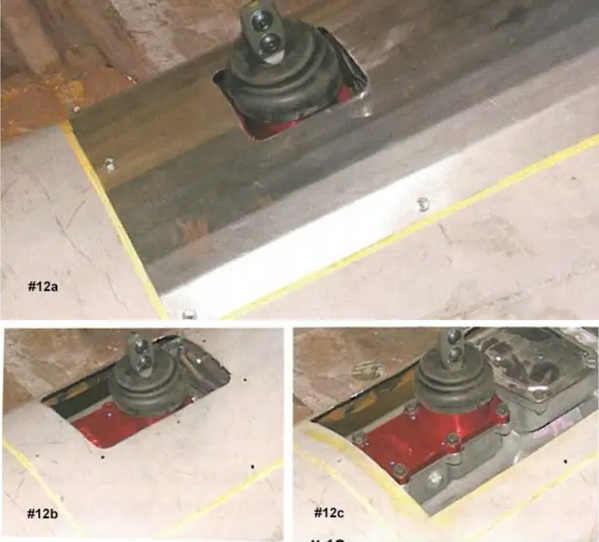
Image #12a, 12b & 12c: With the panel in place, mark the floor around the outer edge of the panel. Remove the panel and cut the floor approximately 2" inboard from the outline mark. This will open up the tunnel area and allow the transmission to be installed in the proper location without binding with the body.
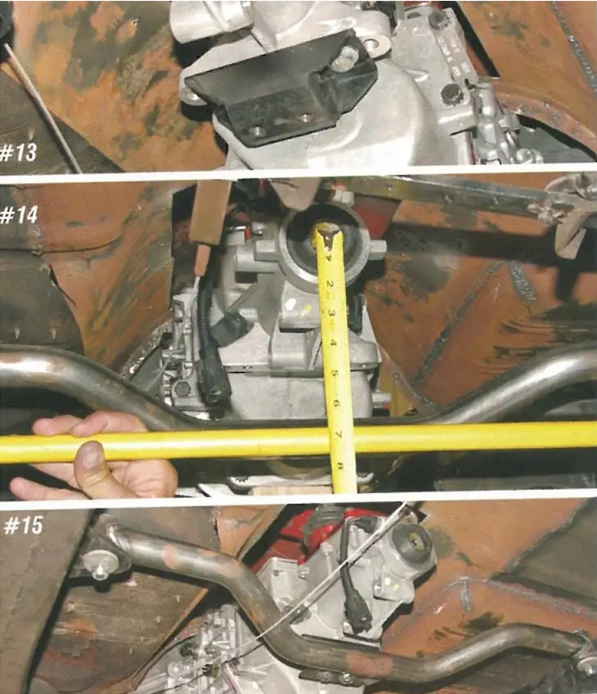
Image #13, 14 & 15: The rear transmission mount PIN 19-26 mounts to the Tremec tailshaft with two 10-millimeter bolts. Secure it to the new PIN 57-132240-1 crossmember.
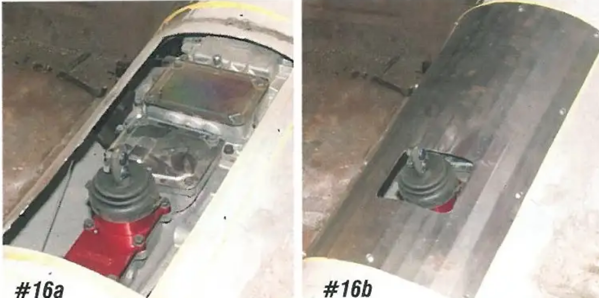
Image #16a & 16b: With the transmission properly mounted, the new tunnel panel can be reinstalled. We elected to screw ours in place to make future access to the top of the transmission a snap.
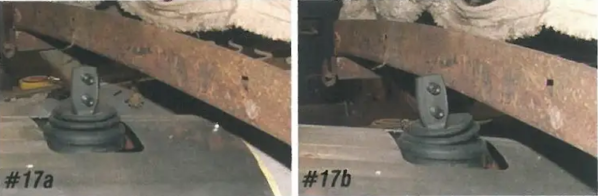
Image #17a & 17b: If the bench seat is going to be used and remain in the rear-most adjustment position, the shifter that comes with the Tremec transmission can be used without adding an offset arm.
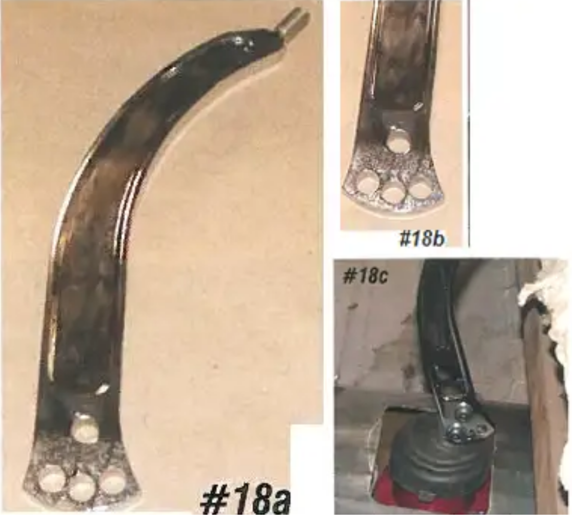
Image #18a, 18b & 18c: The curved shifter arm P/N 08-402 attaches to the shifter with two 3/8" bolts. For a stock bench seat that will remain adjusted to the rear, install the shifter arm using the front lower hole. This will lean the arm forward and clear the bench seat. There are four mounting holes in the shifter arm allowing for several different shifter arm angles.
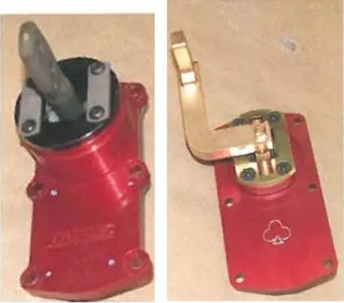
Image #19: If a bench is going to be used and will be adjusted forward, the offset shifter base P/N 57-175629-1 must be installed to clear the bench seat. The offset shifter base is a direct replacement for the shifter base that comes with the transmission. The shifter base is offset to the left 2" and forward 2-3/4". Curved shifter arm P/N 57-175629-1 works great with this base as well.
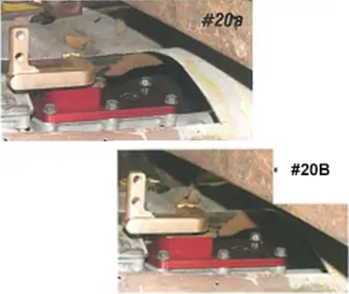
Image #20a & 20b: The offset shifter base bolts to the top of the transmission using the six bolts that mounted the stock shifter base. Photo (a) shows the seat adjusted all the way to the rear, photo (b) shows the seat adjusted all the way to the front.
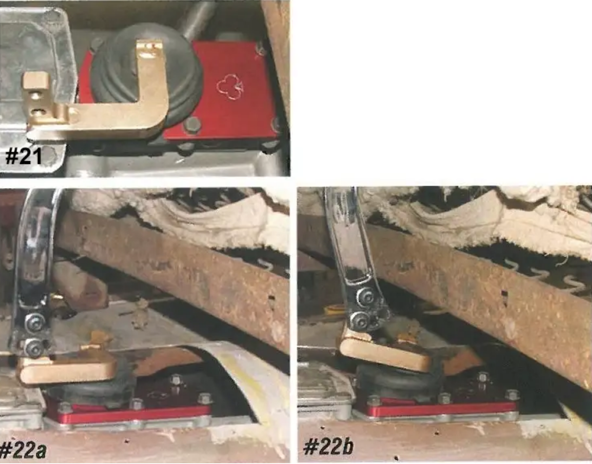
Image #21: With the offset shifter base in place, transfer the rubber boot from the stock shifter base to the offset shifter base.
Image #22: With the offset shifter base, the curved shifter arm can be installed straight up giving plenty of clearance between the shifter arm and the seat with the seat in the reward position. If the seat is going to be moved forward you will want to install the arm in the forward hole. Photo (b) shows the shifter in 2nd gear with plenty of clearance between the shifter arm and the seat with the seat adjusted forward.
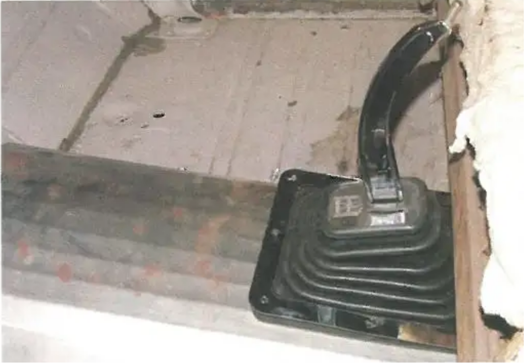
Image #23: with the shifter base and arm installed, the shifter boot can be installed. The large HURST shifter boot P/N 208-09 works perfectly with the McLeod shifter. Enjoy banging those gears and that overdrive 5th gear for some super fun highway driving!