Eckler's Catalogs Available Now!
1961-64 DOOR HINGE REBUILD
1961-64 DOOR HINGE REBUILD
Is that front door sagging a little and does it have a lot of play? This month's tech article explains how to rebuild the front door hinges of 1961- 1964 passenger cars. The front door hinge sets are the same for all 1961-1964 Chevys, 2 or 4-door models. The upper hinges are identical - there is no right or left. The right and left lower front door hinges are mirror images of each other and are "stamped" with an "R" and "L".
We carry an excellent rebuild kit that is produced by Shafers Classic Reproductions; PIN 535021 which will rebuild the two hinges of one door. It contains the pins, bushings, spring, and detent pin assembly Using this kit and a few simple tools will allow you to easily rebuild some old worn out hinges
The procedure explained and photographed for this article involves the rebuilding of the right lower hinge from a 1961-1964. This procedure is easy and does not take very long.
Parts List
40-141535-]
1961-1964 Chevy Door Hinge Pin Kit to replace worn or missing original
Tools Needed:
Hammer
Flat-nosed Punch
9/16" Socket
Vice Grips
Vice
Time Frame
1 Hour
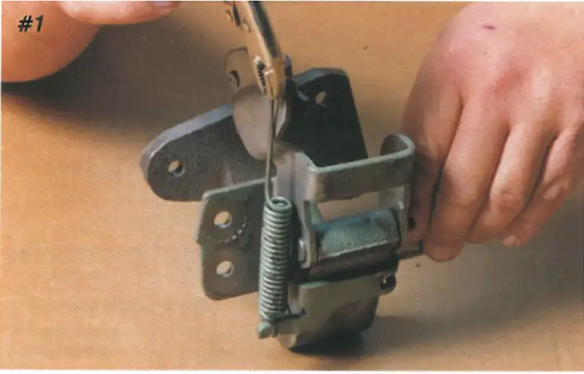
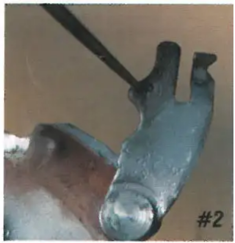
Image #1-2: Use some vice grips to remove the spring. Since it takes some force to remove the spring, hold the hinge in a vice. (Photo #1 shows which end to the spring to remove.) Once the spring is removed, you can more easily see the "R" stamped in the right lower hinge. (See Photo # 2.)
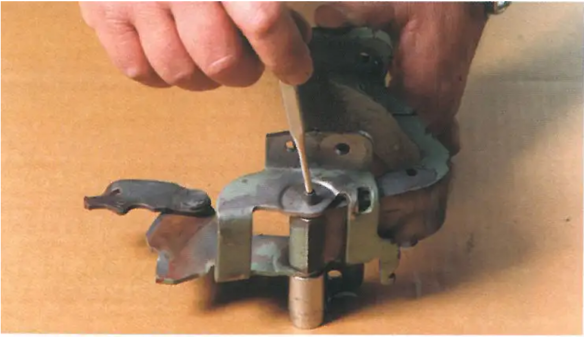
Image #3: Using a flat-nosed punch and hammer, drive the old pin out of the assembly. Notice that a socket is used to support the opposite end of the hinge pin. (See Photo #3.) The socket should be large enough for the head of the pin. Refer to this photo to see the orientation of the various parts of the hinge assembly.
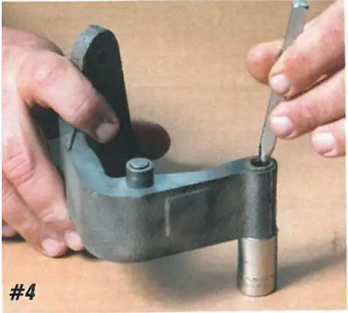
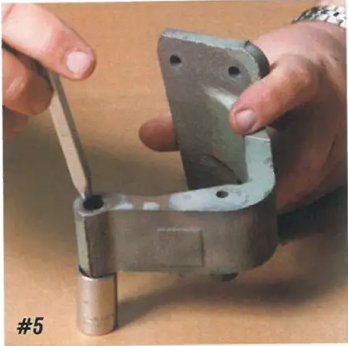
Image #4-5: Next, the old bushings will be removed. Use a flat-nosed punch and hammer to drive these bushings out of the case part of the hinge. Notice, the use of the socket and the tilt of the punch to find the "lip" of the bushing. (See Photo #4.) It takes very little force to drive the bushing out. After removing one bushing, turn the cast piece over and repeat the procedure for the other bushing. (See Photo #5). I found many bushings in these hinges were plastic, that's right plastic not brass or bronze.
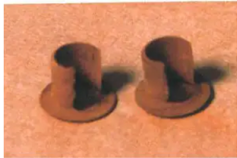
Image #6: Even door hinges that seem fairly tight have bushings which have deteriorated. In Photo #6, the bushings are worn on one side more than the other because of the weight of the door.
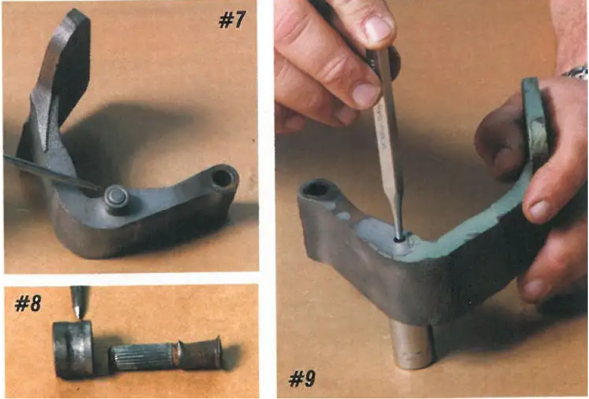
Image #7-8-9: The detent roller needs to be replaced. (See Photo #7.) Due to wear, this roller can get quite a groove. (See Photo #8.) Place a socket over the roller and turn the piece over. Use a flat-nosed punch and hammer to drive the roller and pin out. (See Photo #9.) At this point the hinge assembly is apart. If you have access to a bead-blaster, clean all of the pieces and paint as you want.
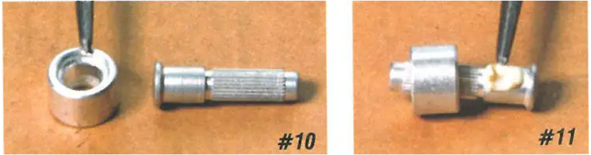
Image #10-11: The roller is asymmetrical; one end has a groove for the head of the pin. (See Photo #10.) Lubricate the pin and position the new roller. (See Photo # 11.) Set the cast piece on the vice or something solid and with a hammer drive the roller/pin into the hinge. The roller and pin go in the side which has a single bolt hole. Refer back to Photo #6.
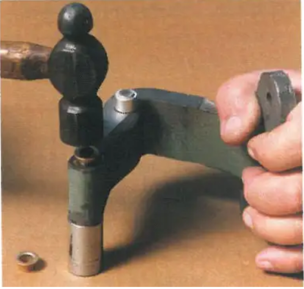
Image #12: Now, the new bushings will be installed in the case piece. Position the bushing in the hinge and position the hinge on a socket or firm surface. (See Photo #12.) Use a hammer to drive the bushing into place. Repeat this procedure for the other bushing.
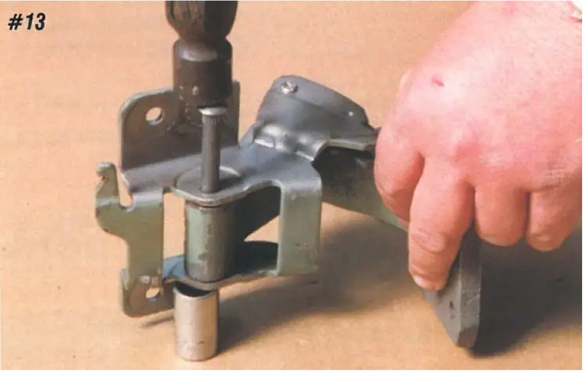
Image #13-14: Reposition the "cast" piece into the "stamped" piece. Also refer to Photo #3 for proper orientation. The head of the pin is on the same side as the spring "hook" of the stamped piece and the single bolt hole of the #14 cast piece. Position a socket on the bottom and with a hammer drive the pin into place. (See Photo #13.) The pin is a little longer than the original. (See Photo #14.)
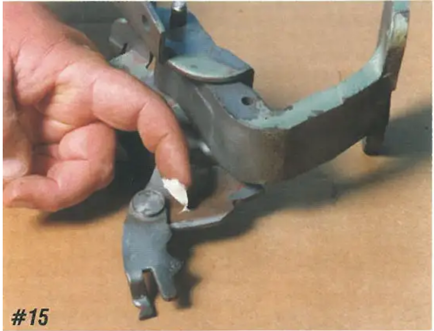
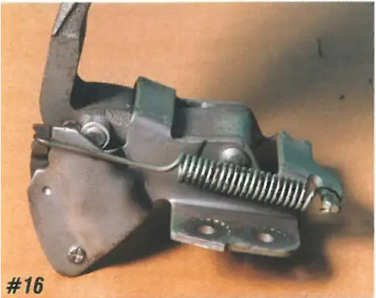
Image #15-16: Lubricate the surface where the spring bracket contacts the main stamped piece. (See Photo #15.) Reinstall the spring using some vice-grips. After rebuilding this hinge you will have a very good lower hinge. (See Photo #16.)
Rebuilding the upper hinge is even easier than the lower. Remember, there is no left or right on the uppers, so mixing the pieces is not a concern.