Eckler's Catalogs Available Now!
1959-64 REAR CONTROL ARM BUSHING INSTALLATION - POLYURETHANE KIT
REAR CONTROL ARM BUSHING INSTALLATION 1959-1964 POLYURETHANE KIT
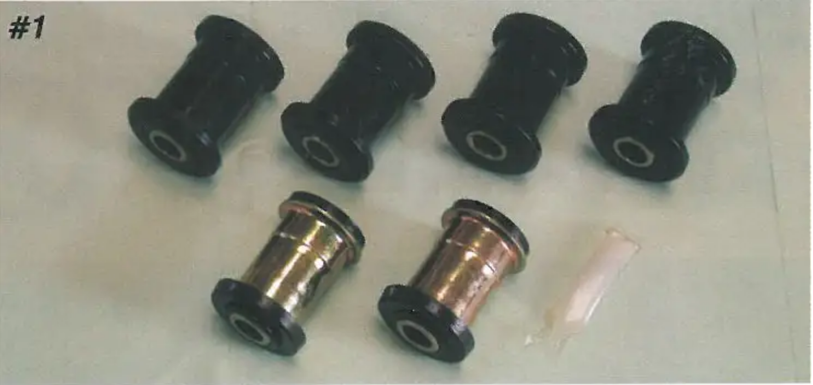
This tech article will explain the installation of new bushings into the rear control arms of 1959- 1964 passenger cars. The article will specifically deal with the installation of durable polyurethane bushings. The polyurethane bushings are the ones you should use in all replacements unless you are building a high-point restored car. The polyurethane bushings are shiny black and could possibly be a point deduction in a restored car (See Photo # 1).
There is a major difference between installing polyurethane and rubber bushings - some of the polyurethane bushings require the use of the original metal sleeve of the original bushing. You need to beaware of this important point before pressing out the old bushings, This article will explain which of the complete bushings need to be removed and which of the metal sleeves need to be left in the rear control arms.
Parts List
40-165950-1
1959-64 Polyurethane Rear Control Arm Bushing Set With Single Upper Control Arm
40-139843-1
1962 Chevy Hood Lip Molding, With Chevrolet Lettering
Tools Needed
Shop Press
Miscellanous Tools
Time Frame
2 Hours
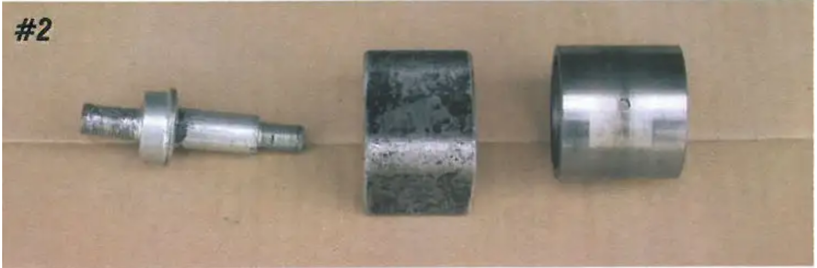
The basic procedure in replacing the bushings is to "press out the old," and then "press in the new". This article will specifically explain the procedure in removing the old rubber bushings and replacing them with the new polyurethane bushings. The special tools that you will need are a press and three metal "tools" which will be used in pressing the bushings "in" and "out." As seen in Photo #2, these special "tools" are: a rear shock bolt (or similar tool), a special "U-shaped " spacer and a steel cylinder.
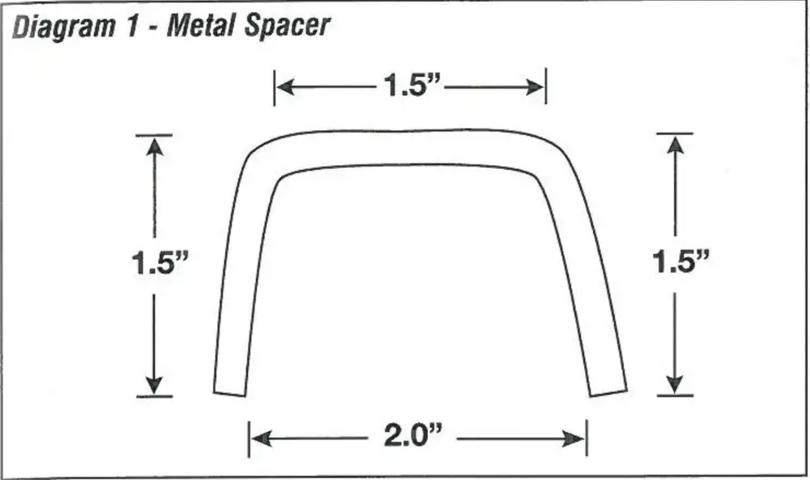
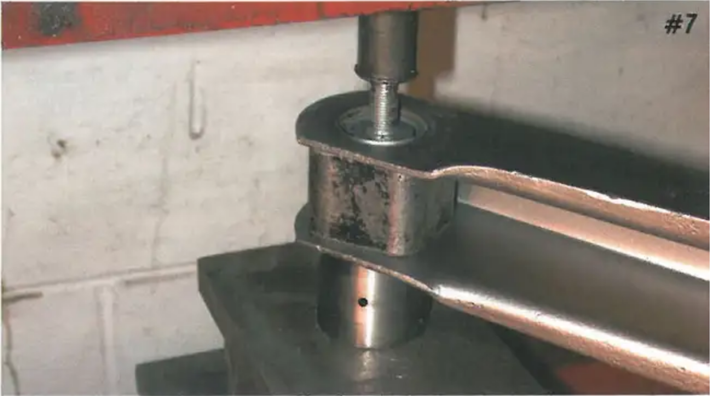
The rear shock bolt or shouldered pin will be used to press the bushings out. The spacer will be used to maintain the shape of the rear control arm while you are pressing the bushings "out" and then pressing them back "in." If the spacer is not used, the control arm will collapse under the pressure of the press. If the control arm collapses, you will need to replace it because it usually can not be repaired. The steel cylinder will allow the rubber bushing to be pressed out while keeping the outer metal sleeve from being pressed out. The spacer is steel with the profile shown at 100% and the height is 1.6875 inches (1-11/16 inches). (Refer to Diagram #1).
The procedure will be explained in detail for one of the lower rear control arms. Repeat the procedure for the other lower control arm. Then follow the same basic procedure for installing the two bushings in the upper control arm.
You will re-use the metal sleeves for all the bushings, except the forward bushings in the two lower control arms. Notice in Photo # 1 that there are two bushings with metal sleeves and 4 without. The our bushings without metal sleeves require that you use the original sleeve.
Diagram 1 - Metal Spacer
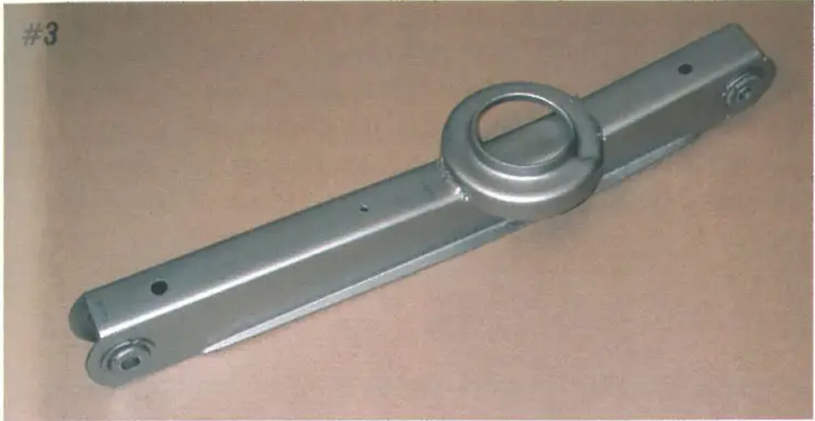
Follow the procedure in the Shop Manual to remove the rear control arms from the 1959-1964 passenger cars. That procedure can be found in the "Suspension" Section of the Shop Manual. (Follow all precautions.) Sandblast the control arms before removing the bushings. Now you can easily identify the rubber and steel parts of the bushings. In Photo #3, the front (left side of photo) and the rear (right side of photo) bushings are identified, The complete forward bushing will be removed - that includes the metal sleeve, only the rubber part of the rear bushing will be removed leaving the outer metal sleeve in the rear control arm. | suggest marking the ends so that you don't press out the wrong bushing.
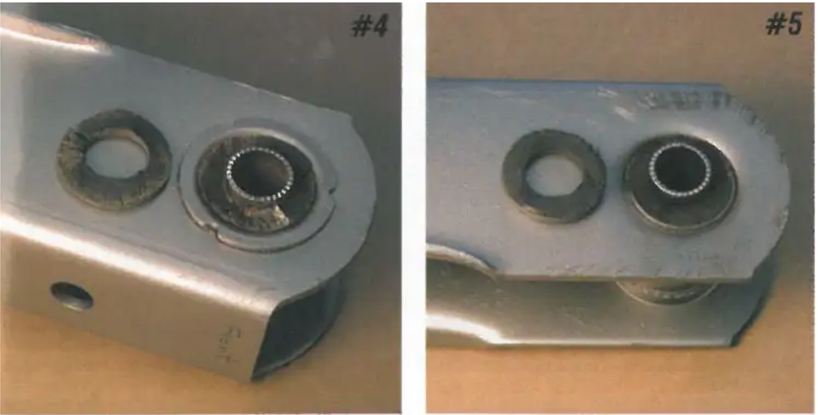
Cutting the outer rubber part of the bushing will make the job of removing the bushing much easier. Use a hack saw to trim the rubber away from the outer and inner sleeve. (See Photos #4 & #5.) Repeat this process for both sides and both ends of the rear control arm.
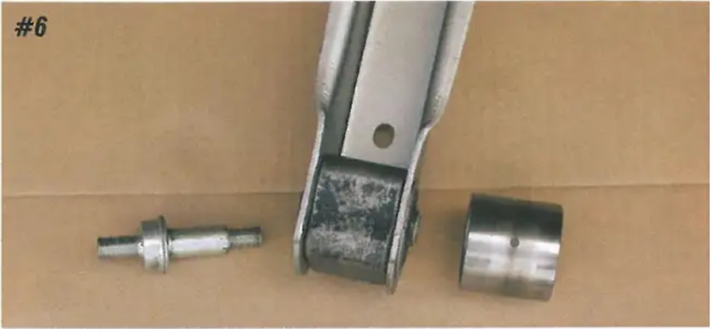
Only the rubber part of the rear bushing will be pressed out. The order and orientation of the "tools" for pressing this part of the bushing can be seen in Photo #6.
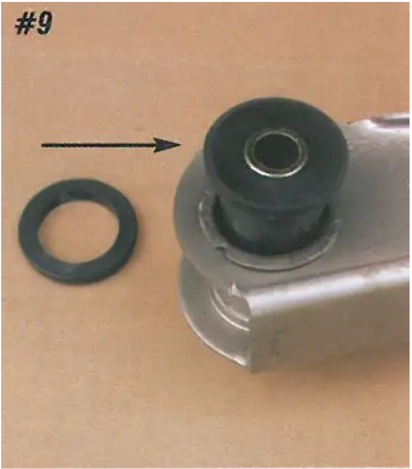
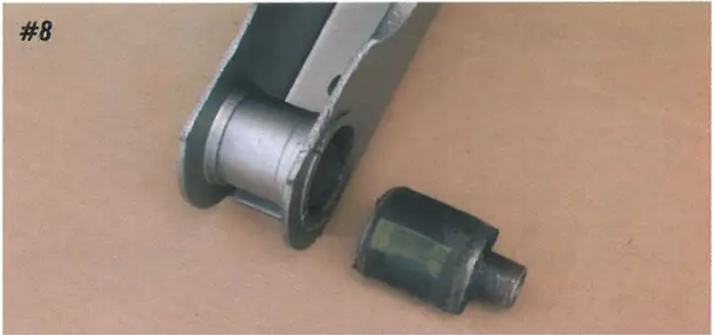
Now the new polyurethane bushing will be installed . Position the main part of the new bushing into the original metal sleeve. Notice that one end of the new bushing has a permanent lip and the other end has a removable lip. The end with the permanent lip goes against the outer metal sleeve lip. (See arrows in Photo # 9.)
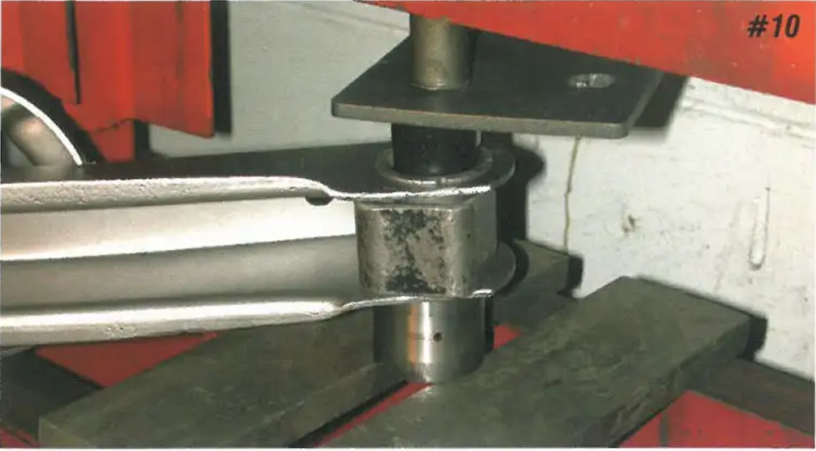
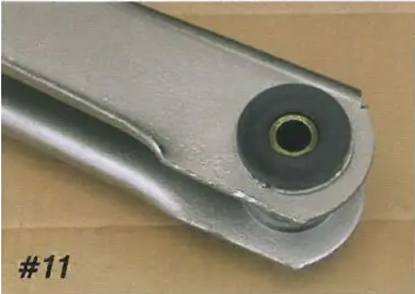
With a flat plate at the top, press the new urethane bushing into place. Notice the metal spacer is used in the rear control arm and the steel cylinder is the support. (See Photo # 10.) When the new bushing is in place, the urethane lip will be flush with the metal lip of the old metal sleeve. (See Photo#Il.)
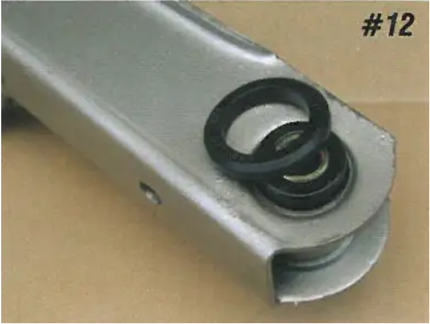
Turn the control arm over and install the removable lip over the end of the bushing that protrudes out of the control arm. When installed correctly, the part numbers of the removable lip will be showing. (See Photo # 12.) | suggest putting some masking tape around the end of the new polyurethane bushing so that the removable lip does not fall off Remove the tape just before installing the control arm back into your Late Great Chevy.
Now the entire forward bushing will be removed - the outer metal sleeve and the rubber/metal center. One important point to be made here is that the inner diameter of the steel cylinder needs to be larger than the lip diameter of the bushing's metal sleeve. As the bushing is pressed out, the metal sleeve will move out of the control arm and down through the steel cylinder.
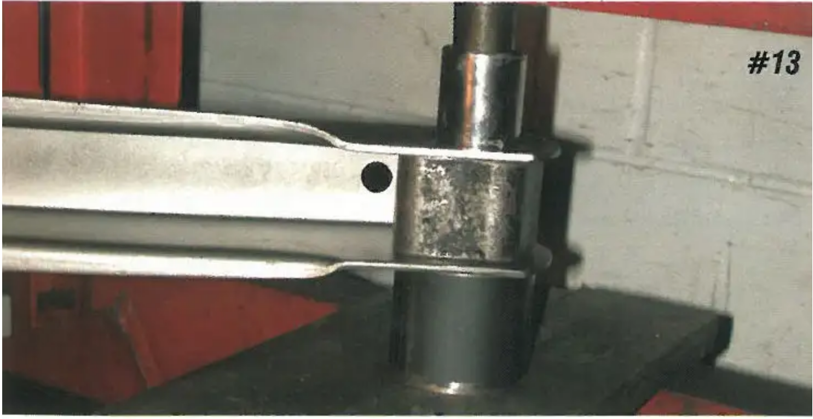
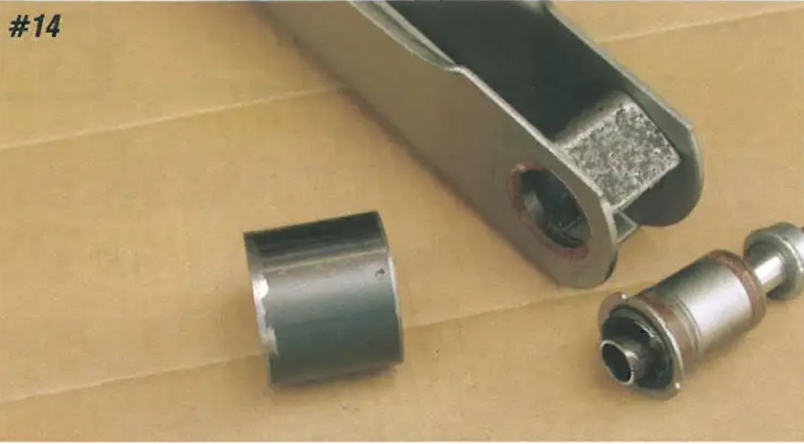
The order and orientation of the "tools" for pressing the part of the bushing can be seen in Photo #13. Line up the pieces in the press and get them very straight. Notice that the control arm with the folded lip of the outer metal sleeve goes against the cylinder tool. A socket that is just small enough to fit in the hole of the control arm is used at the top. With the help of another person, line up the assembly in the press. (See Photo #13) Slowly start to press the complete bushing out of the control arm. When it "pops" loose, use the rear shock bolt to finish pressing the bushing out of the control arm (See photo #14)
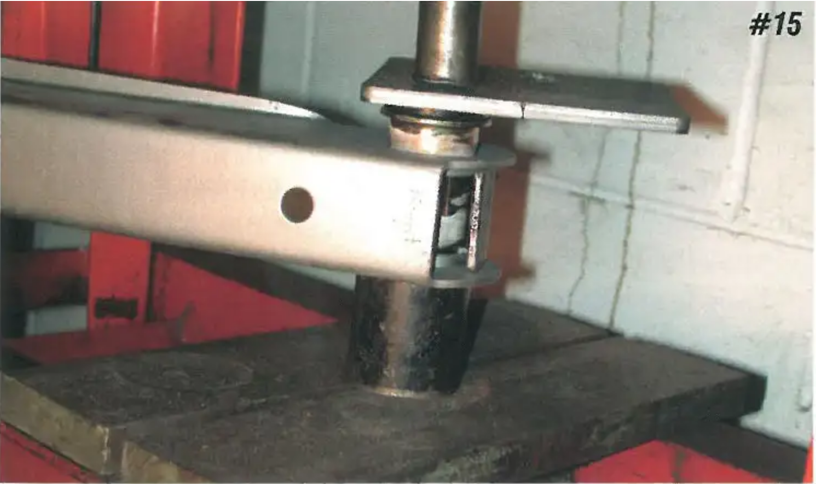
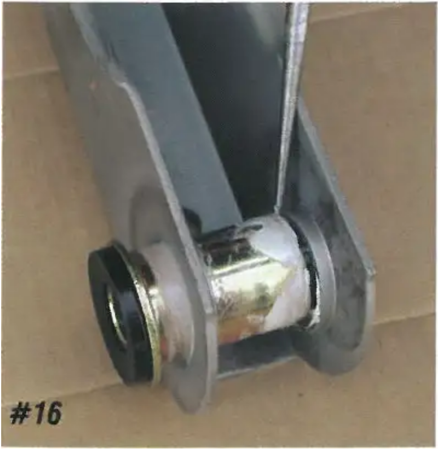
Now the new polyurethane forward bushing will be pressed into the control arm. Using the grease provided in the new kit, lubricate the outer metal sleeve of the new polyurethane bushing. The order and orientation of the "tools" for pressing the new sleeved-bushing into place can be seen in Photo into place. Notice in Photo #15 that the bushing is not quite lining up with the lower hole in the control arm. Remove the control arm from the press to check it out. See where the awl is pointing in Photo # 16. Notice th at the bushing is not lined up with the hole.
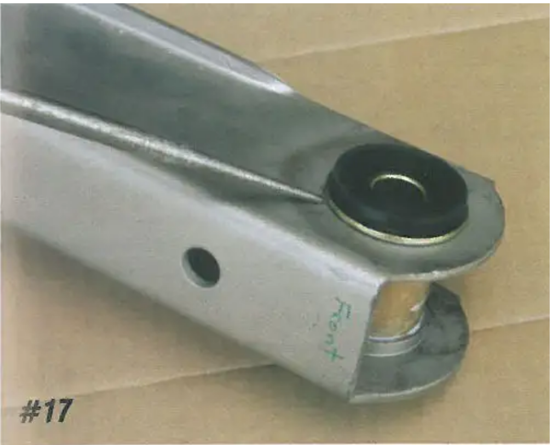
Use a long center punch to line up the bushing with the lower hole. If that does not work, position the assembly back into the press and align it so that as the press starts to push the bushing, it straightens it out. Once it is aligned, re-align the assembly in the press and then press the bushing into place. (Refer to Photo #15) When the bushing is in place, the metal sleeve will be flush with the control arm (See Photo #17)
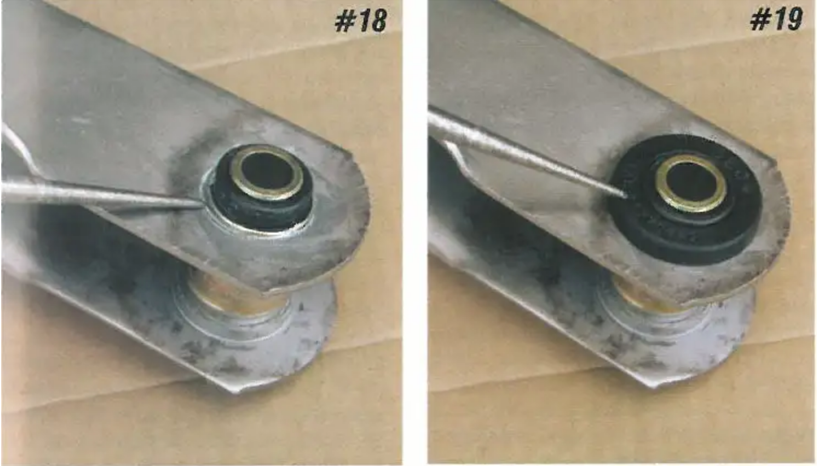
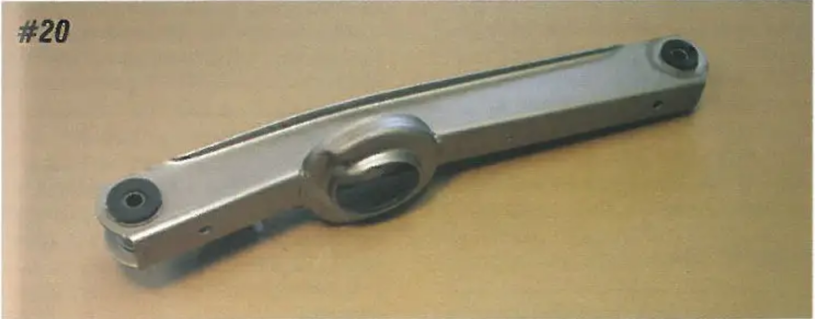
Turn the control arm over and notice that the end of the metal sleeve is sticking through the hole in the control arm. (See Photo # 18.) Position the removable lip (so that the part numbers show) onto the bushing.(See Photo #19.) The finished rear control arm will not only look great, but it will also work great when installed. (See Photo # 20.) Wrap the ends of the control arm with some masking tape to keep the removable ends of the bushing from falling off.
Repeat Steps #2-#11 for the bushings of the other lower rear control arm.
Repeat Steps #2-#6 for both bushings in the upper control arm. You are now ready to re-install all of the rear control arms into your 1959-1964 Late Great Chevy.


