Eckler's Catalogs Available Now!
1955-64 Aftermarket Power Brake Booster Installation and Adjustment
Aftermarket disc or drum brakes are the single most upgrade on a Classic 1955-64 Chevy. There are several things to consider when replacing a stock non-power master cylinder with an aftermarket brake booster. Most aftermarket brake boosters will bolt up to the stock firewall without any modifications, but if everything is not adjusted, the booster will not work correctly, giving you braking action. In this article, we will show you how to install an aftermarket booster on your Classic and make all the necessary adjustments.
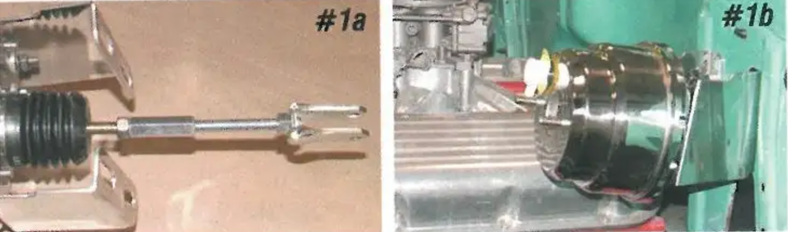
Image 1: When installing an aftermarket brake booster on a 1955 to 1964, PIN 57-157863-1 booster and mounting brackets bolt directly to the firewall using the four studs that mounted the original non-power brake master cylinder. If your 1955-58 car had the original Treadle-Vac brakes, the brake assembly will need to be changed to a non-power brake assembly. The brake differs in shape and will not give leverage or travel. The mounting brackets that bolt to the back of the booster give the booster a slight upward angle giving increased travel. There is a 3" long clevis that connects to the stock non-power brake. This is adjustable so that the brake height can be set.
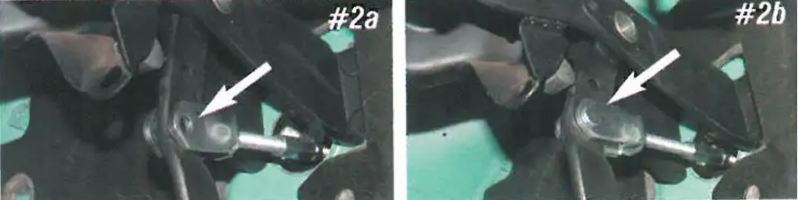
Image 2: The reason for mounting the booster at an angle is to relocate the attaching point for the lower end on the brake swing arm. On a non-power brake swing arm, the 3/8" hole for the master cylinder is 2" down from the top of the arm. When installing a new booster, a new 3/8" hole must be drilled in the brake swing arm 1" lower than the stock hole. This will change the brake ratio from 5.5 to 1 to 3.6 to 1. The booster will not operate unless the hole is relocated in this manner. The clevis is held to the brake swing arm with a pin and cotter that is included in the booster kit. Adjust the booster so that the brake swing arm is 1/16" below the brake bumper (PIN 57-131189-1).
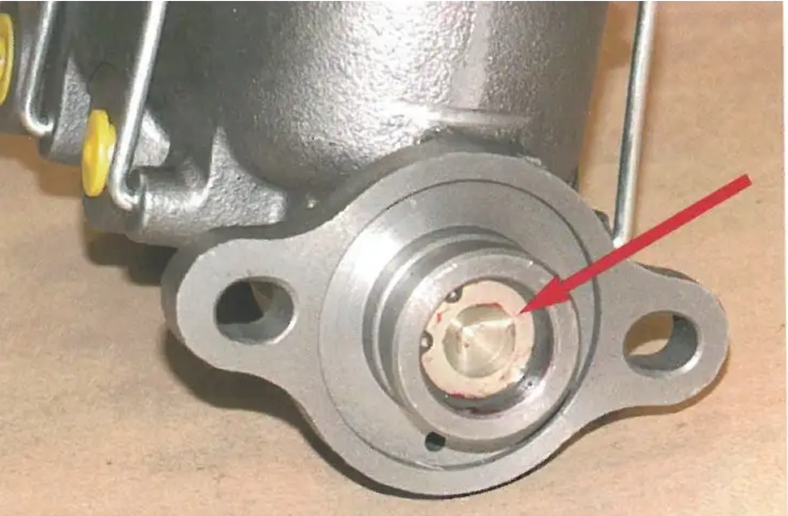
Image 3: The master cylinder that is used on the brake booster has a shallow dimple in the rear of the cylinder. A non-power master cylinder has a 1" deep hole in the rear of the cylinder. When the master cylinder is installed on the booster, the rod from the booster should just rest on the dimple on the master cylinder with no pressure on the rod. If the rod from the booster is adjusted out too far and depresses the rod any at all, the residual valves in the master cylinder will not allow the brakes to bleed back when the pedal is at rest, and the brakes will hydraulically lock up. The end result: your car will not roll! If a non-power master cylinder is installed (with the 1" deep hole), you may get no brakes at all since the booster will not reach and activate the master cylinder.
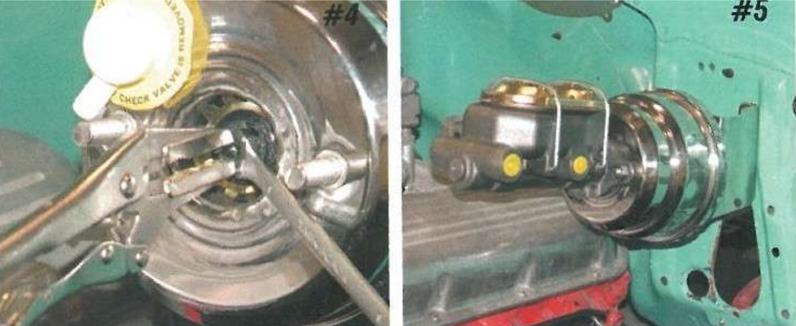
Image 4: The rod on the front of the brake booster is adjustable. By holding the nut on the booster by hand and turning the center, it may be lengthened or shortened to achieve the clearance.