Eckler's Catalogs Available Now!
1955-57 Radiator Installation
The radiator core support is the main component that ties the front end sheet metal together in addition to the mount for the radiator. The original core support is made out of C-channel sheet metal and no matter how much body work you do, it still looks like something from the horse and buggy days. Eckler's Classic Chevy manufactures a tubular core support that replaces the original core support and is constructed of 78" round tubing. The 78" round tubing results in a custom-looking engine compartment and 12" more clearance between the fan blade and radiator. Custom radiator filler is also available for the tubular core support.
Parts List
- 57-142258-1 - 1955 Tubular Radiator Core Support
- 54-74 - 1956 Tubular Radiator Core Support
- 57-142260-1 - 1957 Tubular Radiator Core Support
- 57-132118-1 - 1955-57 V8 Aluminum Fan Shroud
- 57-132119-1 - 1955-57 6-Cylinder Aluminum Fan Shroud
- 57-159826-1 - 1955-57 Griffin Cross-Flow Upper Radiator Hose
- 57-160363-1 - 1955-1957 Chevy Griffin CrossFlow Radiator for better cooling
- 57-132057-1 - 1955-57 Upper Radiator Hose
- 57-132058-1 - 1955-1957 Chevy Lower Radiator Hose that replaces the leaking original
- 57-132134-1 - 1955-57 Radiator Relocation Kit
- 57-132081-1 - 1955-1957 Chevy Radiator Saddle Shim Set to replace the worn or missing original
- 57-162763-1 - 1955-57 Polished Billet Aluminum Extra Clearance Hood Latch Plate
Tools Needed
- 34" Masking Tape
- 12" Wrench
- 5/32" Allen Wrench
Time Frame
- 4 Hours
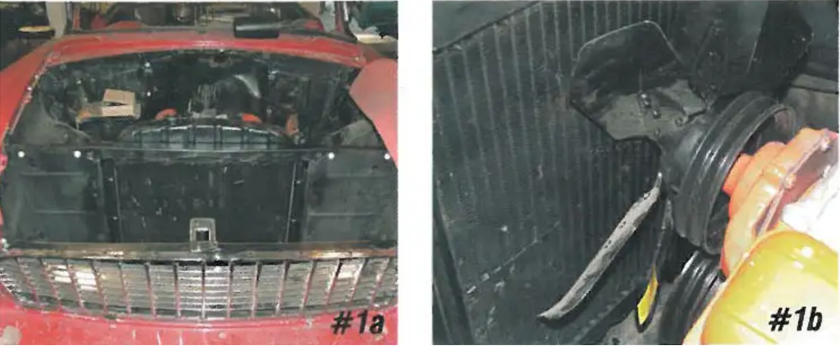
Image 1 With the radiator in the VS (behind the core support) and using a short water small block, the fan blade is very close to the radiator core. When additional components are added to drive air conditioning or steering, a fan spacer is required so the fan will clear the additional. With the fan spaced forward, it may no longer clear the radiator core.
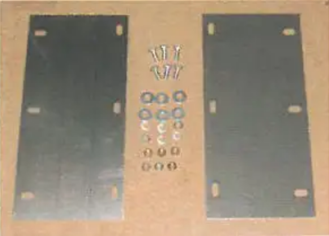
Image 2 A simple solution for this is to move the radiator to the 6-cylinder (in front of the core support). This can be done by removing the VS core support and installing a 6-cylinder core support and a 6-cylinder radiator. Or, a clean and simple solution is to use the radiator relocation brackets PIN 57-132134-1. These brackets install a VS radiator in the 6-cylinder using the original VS core support.
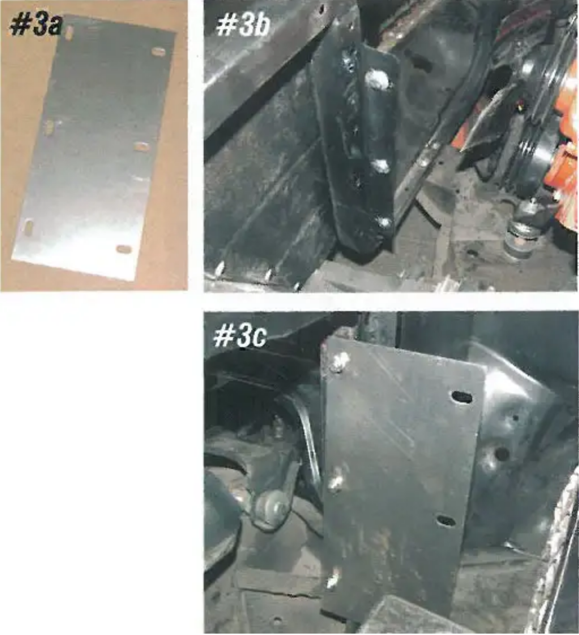
Image 3 The radiator is bolted to the core support with three bolts. Drain the radiator, remove the six radiator mounting bolts, the radiator hoses, transmission cooler lines (if the car is an automatic), and the radiator can be removed. The mounting holes in the relocation brackets are slotted, allowing the radiator to be adjusted up and down as well as front to rear.
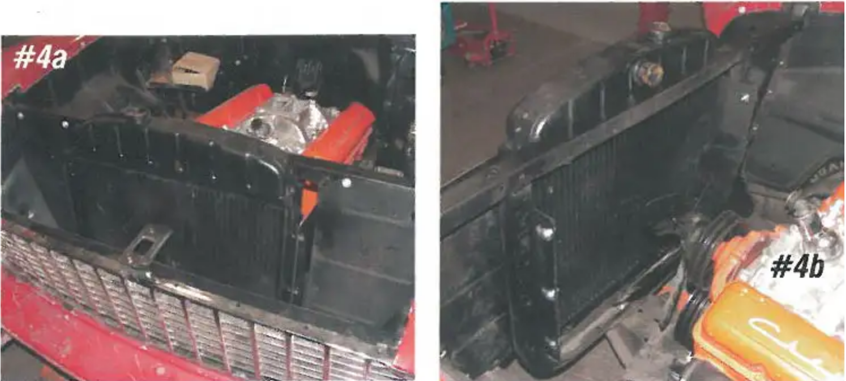
Image 4 Using the original radiator mounting bolts, attach the radiator to the new relocation mounting brackets and adjust appropriately. With the radiator now in the 6-cylinder, there is plenty of room for any type of system, a long water on a small block engine, or even a short water big block engine.

Image 5 With the VS radiator relocated to the 6-cylinder, longer radiator hoses must be installed. Use PN 57-132057-1 for the upper hose and PN 57-132058-1 for the lower hose. These hoses are also used if a 6-cylinder radiator and 6-cylinder core support are being used along with a small or big block. If the car has an automatic transmission, longer cooler lines will be needed as well, PN 57-132268-1 for a 1p00350400 or PN 57-132293-1 for a 700R4.
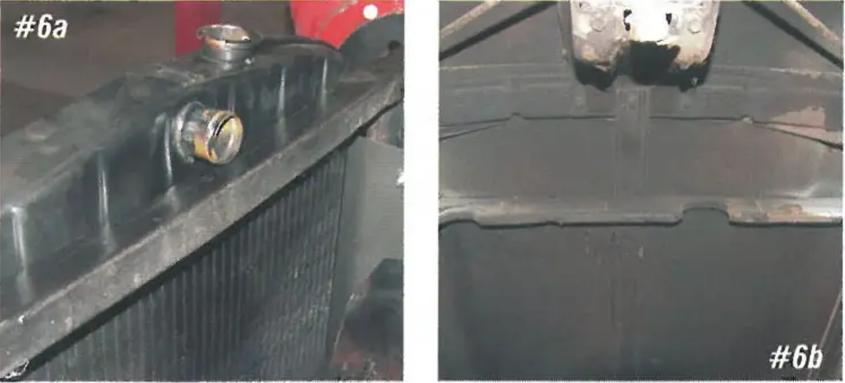
Image 6 The radiator top tank neck on the 1955 and 1956 cars is centered for both VS and 6-cylinder radiators. The radiator top tank neck on 1957 cars was centered on VS radiators but is offset to the driver's side on 6-cylinder radiators. The underhood baffle must be notched on 1957 cars when a VS radiator is installed in the 6-cylinder.
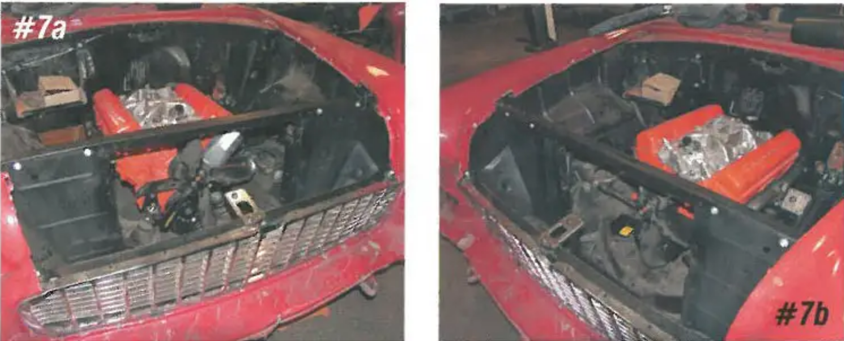
Image 7 The original core support is made out of stamped C-channel that has ripples in the steel from being formed and is fairly weak when compared to a tubular design. The radiator filler bolt to the front of the core support, and their crude appearance can take away some of the smoothness on a custom car. If you need a radiator core support, they are only available used, are hard to find, and are usually in poor condition.
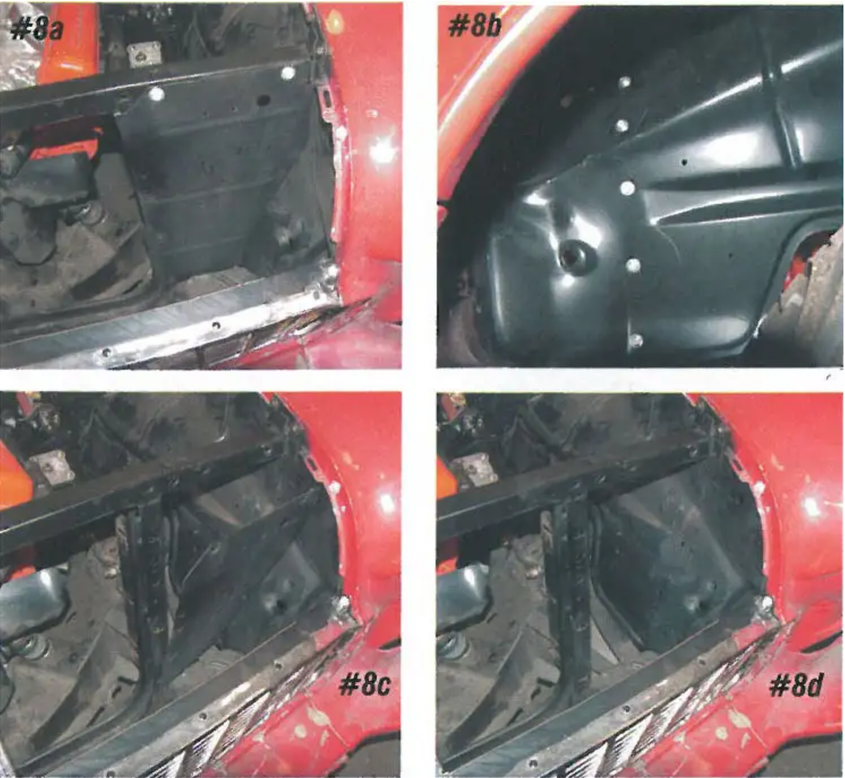
Image 8 We are going to swap out the original radiator core support with the Eckler's Classic Chevy tubular core support. Using the tubular core support will not only give your engine a more custom look, you will also gain almost a 12" more clearance between the radiator core and the fan blade when the radiator is in the VS. To remove the old core support, remove the left and right radiator filler. The bolt to the front of the core support, to the splash and inner fender wells. With all the bolts removed the filler can be removed from the core support.
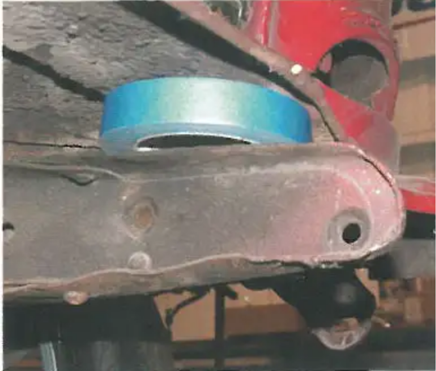
Image 9 The radiator core support also holds the front fenders in. The fenders MUST be supported before the core support is removed or damage may occur. We found slipping a roll of 3/4" masking tape between the splash and the top of the frame supported the front fenders.
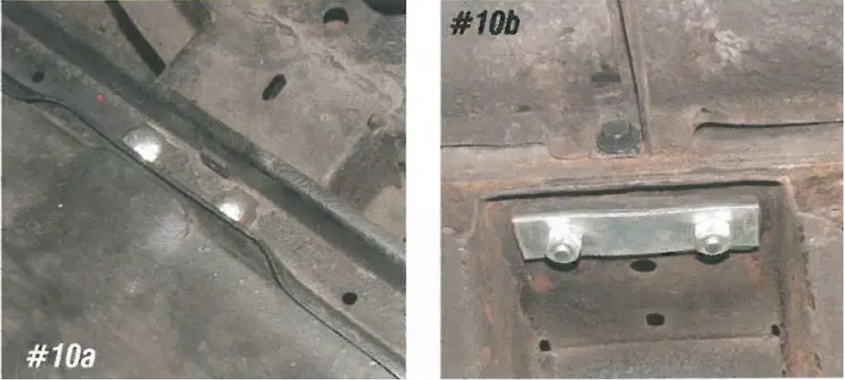
Image 10 The radiator core support is bolted to the frame in the center with two 3/8" carriage bolts and nuts. There are cushions and shims located here between the core support and frame.
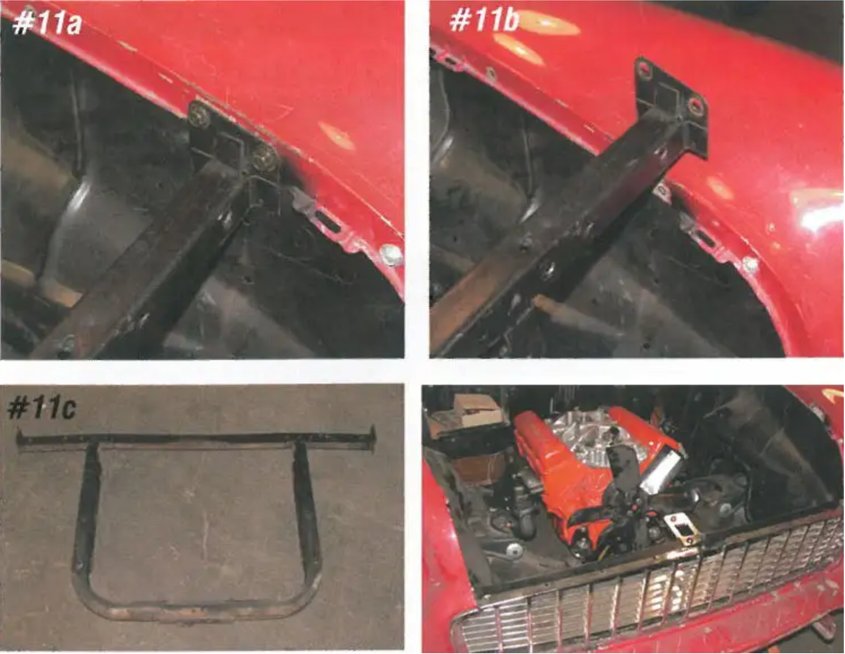
Image 11 Remove the two bolts on each side of the core support where it is bolted to the front fenders. There are often shims between the core support and inner flanges of the fenders. With the bolts removed, the core support can be lifted straight up and out of the engine compartment.
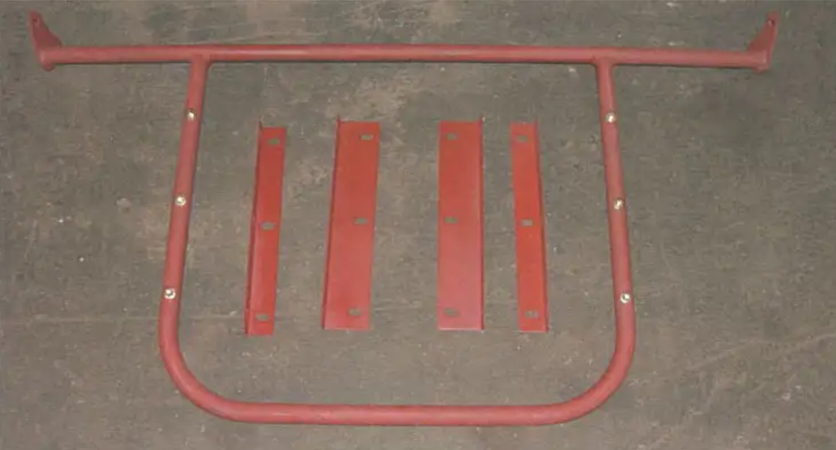
Image 12 One of the best features of the tubular core support is that the same core support can be used to mount a 6-cylinder or V8 down-flow radiator as well as a cross-flow radiator.
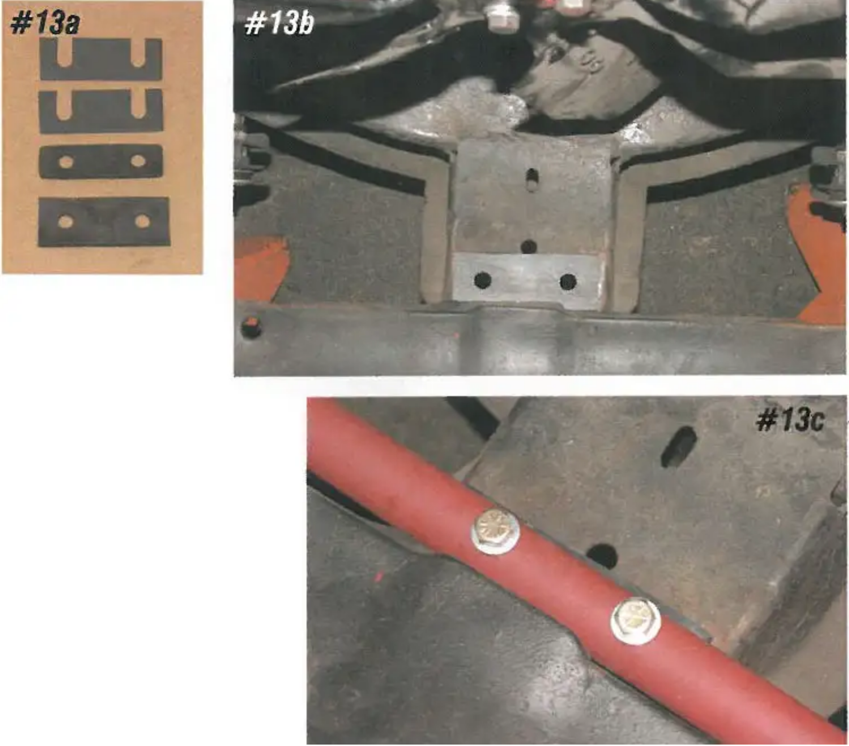
Image 13 The radiator core support cushion kit PIN 18-23 includes the cushions and shims to mount a stock or tubular core support. Place just the upper cushion on the frame and install the tubular core support using the supplied 3/8" X 2-1/2" bolts, flat washers, and lock nuts. The shims may need to be added later to align the core support to the front fenders.
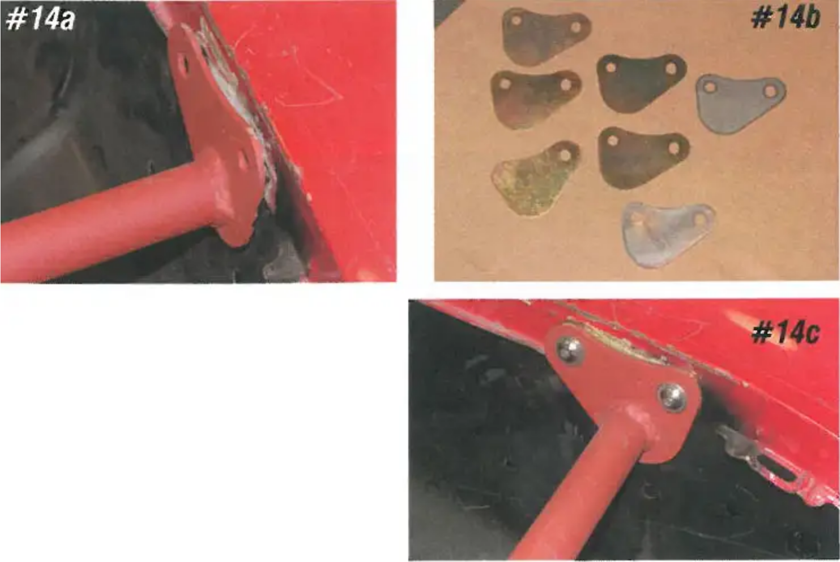
Image 14 The tubular core support bolts to the fenders using the same holes the stock core support uses. Shim as required using the supplied new shims.
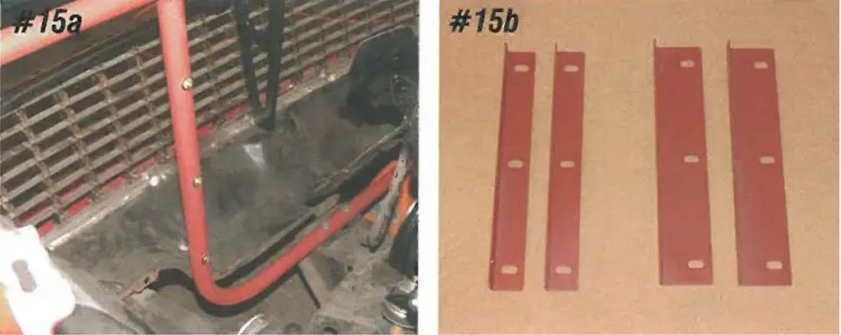
Image 15 The mounting brackets for the radiator bolt to nut inserts on the backside of the tubular core support to give the front side of the core support a very clean look. The short brackets are used to mount the radiator in the V8, while the long brackets are used to mount the radiator in the 6-cylinder.
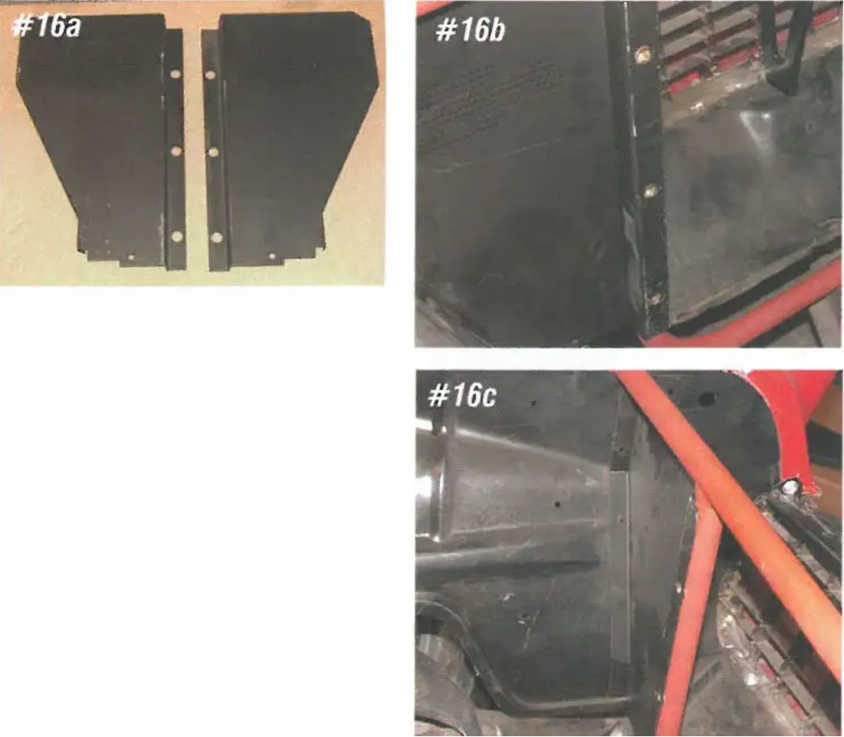
Image 16 The tubular core support uses custom filler that bolts to the backside of the core support and to the original holes in the inner fenders and splash. They are available with louvers or bowties, carbon steel or stainless steel.
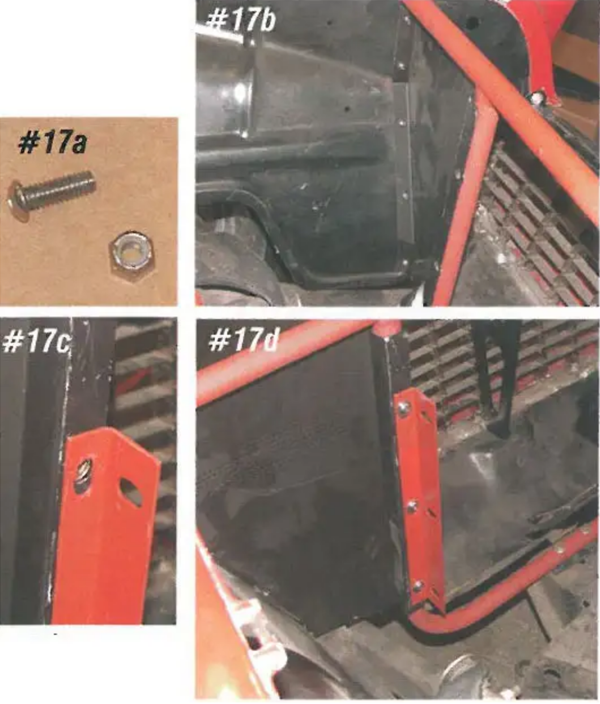
Image 17 The tubular core support kit includes stainless steel button head hardware. The 1/4" bolts and lock nuts hold the filler to the inner fenders, and the 5/16" bolts hold the radiator mounting brackets to the core support. The vertical slots on the radiator mounting brackets mount to the core support.
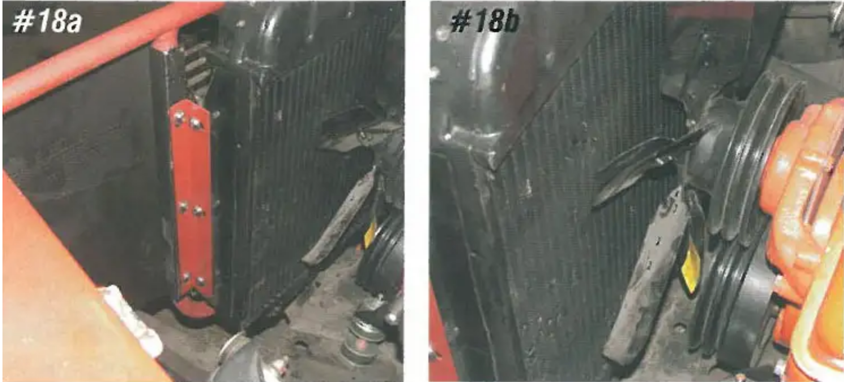
Image 18 The tubular core support is made of 7/8" round tubing, while the old stock core support measures 1-1/4". By installing the tubular core support, you will gain 12" of additional clearance between the fan blade and radiator core. This can be significant when you are installing different accessories on the front of your engine.
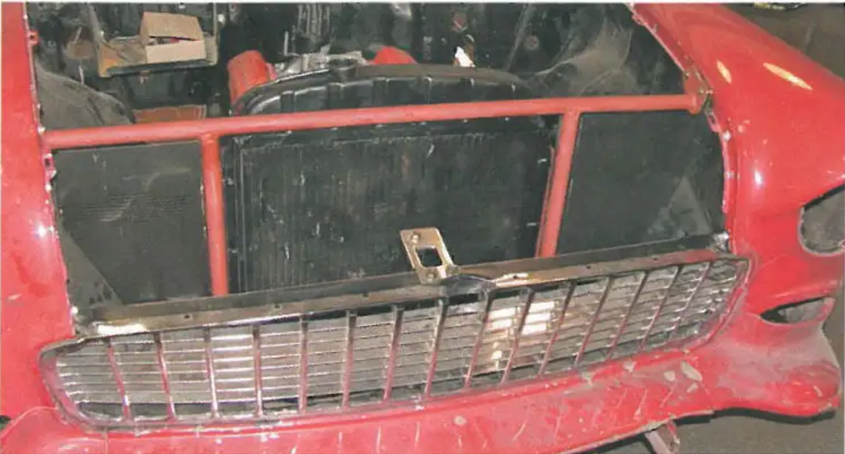
Image 19 The tubular core support and filler can be body-colored to really give the engine compartment a custom look. Be sure to test fit everything before applying paint.
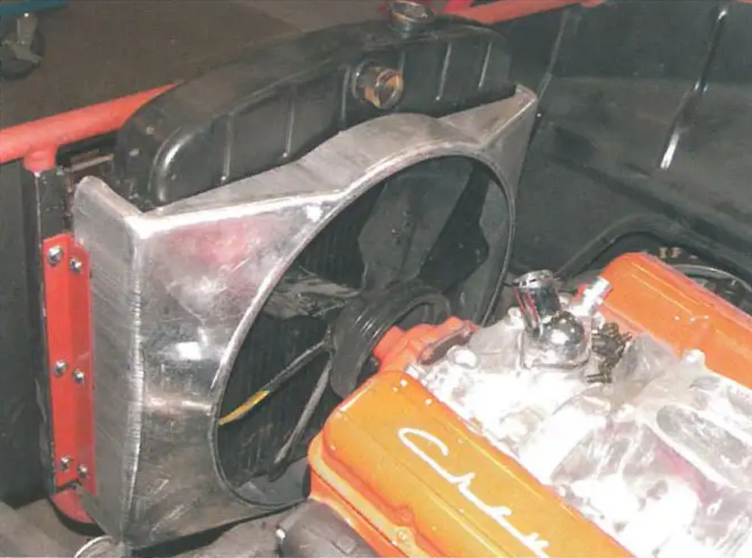
Image 20 A great addition to any radiator is installing a fan shroud. A fan shroud will force all the air that is by the fan blade through the radiator and, in turn, make the cooling system much more efficient. The aluminum fan shroud for a radiator in the V8 position is PIN 57-132118-1. Our aluminum fan shroud can be sanded and coated.
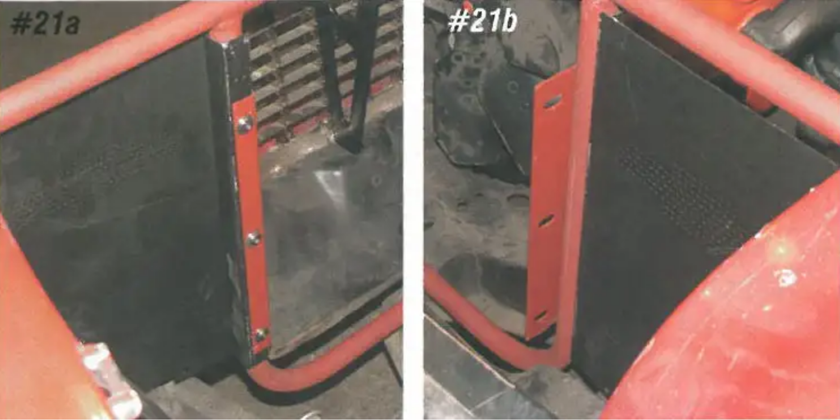
Image 21 If your 6-cylinder radiator is going to be mounted in the 6-cylinder, the longer radiator brackets supplied with the tubular core support will be used. The 6-cylinder brackets bolt to the nut inserts on the backside of the core support and feed through the opening to mount the radiator in the 6-cylinder.
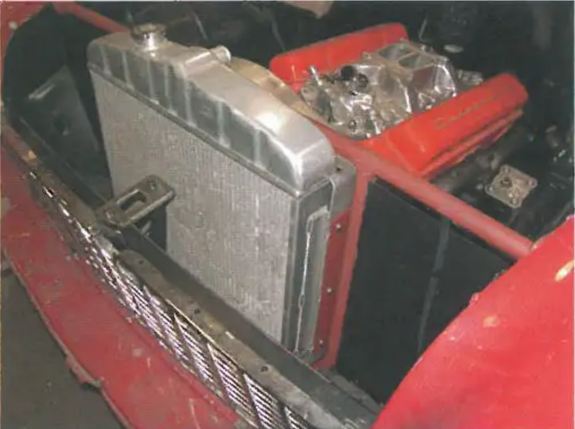
Image 22 A 6-cylinder radiator will bolt directly to the new brackets. The aluminum fan shroud PIN 18-307 will work with the tubular core support.
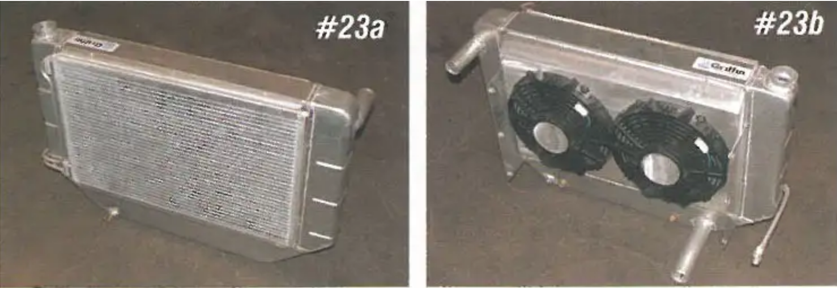
Image 23 If you want to install the "Mack Daddy" of radiators, you need the Griffin cross-flow. The cross-flow radiator bolts to a stock VS radiator core support or can be used with the tubular core support and the VS brackets. This radiator can be used with electric fans and an AC condenser or it can be used separately.

Image 24 A 2" hole must be drilled in the driver's side filler for the upper radiator hose on the cross-flow. A template is supplied with the cross-flow radiator so there is no guessing on where to make the hole.
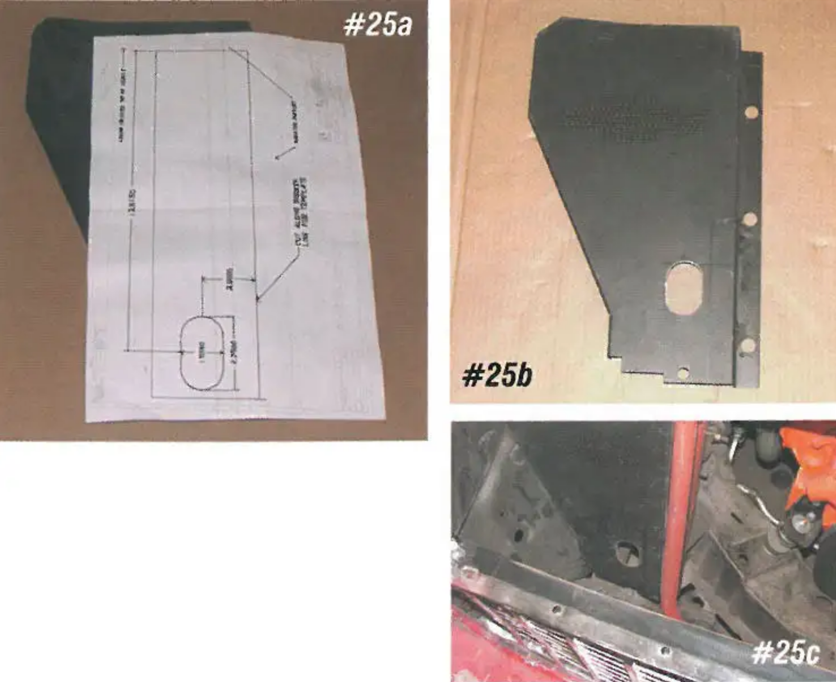
Image 25 If the cross-flow AC condenser is used, a hole must be drilled in the side filler for the condenser lines. Using a 1-1/4" hole saw, drill two adjacent holes and connect them to create an oval.
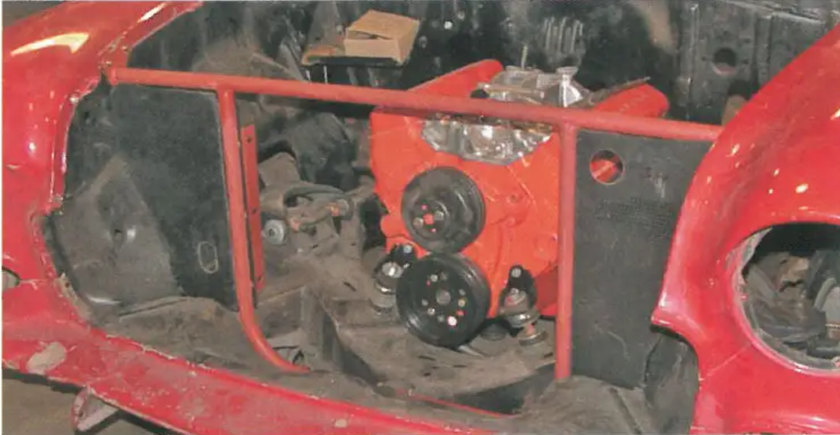
Image 26 On 1955 cars only, the grille, grille molding, and grille tie bar must be removed to install the cross-flow radiator.
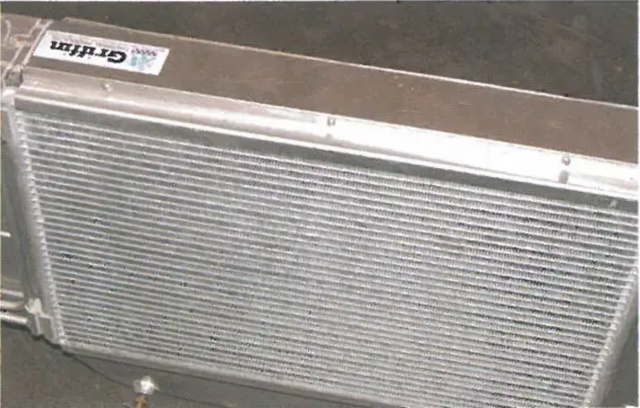
Image 27 The AC condenser must be removed from the radiator to allow the radiator to be installed on all years.
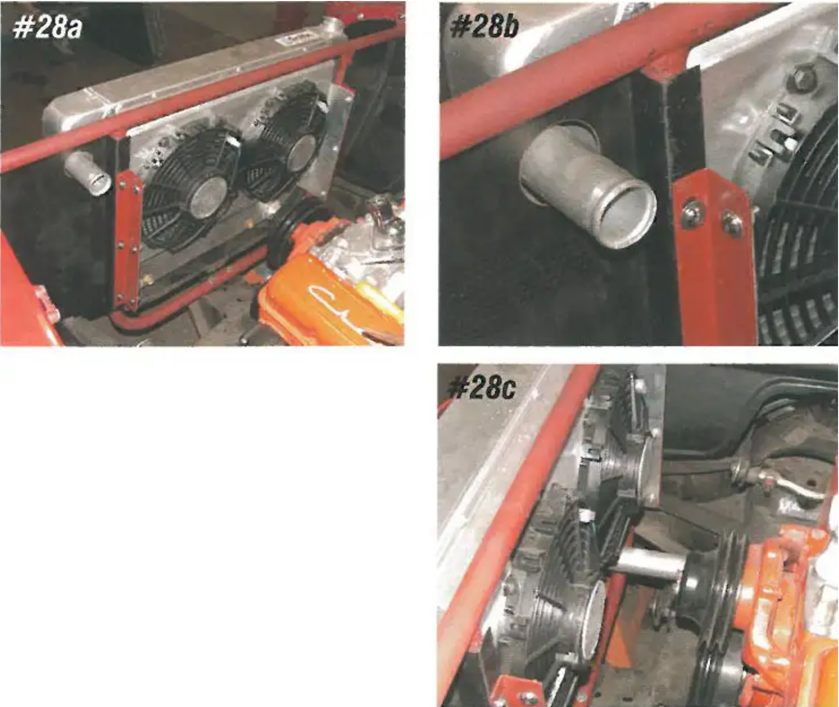
Image 28 The radiator bolts to the VS brackets using the supplied stainless steel Allen head bolts. The radiator can be adjusted up or down to center the upper water neck in the new hole in the filler. With the radiator in the 6-cylinder, even with the electric fan system, there is plenty of room for any fan belt configuration.
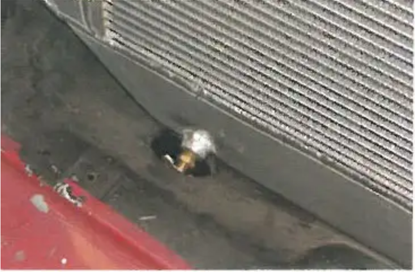
Image 29 The Griffin cross-flow has a large lower tank that fits between the left and right side tanks. This tank adds five additional quarts of coolant over other cross-flow brands, which will only help the cooling capacity. In addition, this tank fills the well area in the splash in front of the core support. The drain on the cross-flow will line up with the original hole in the splash for the stock.
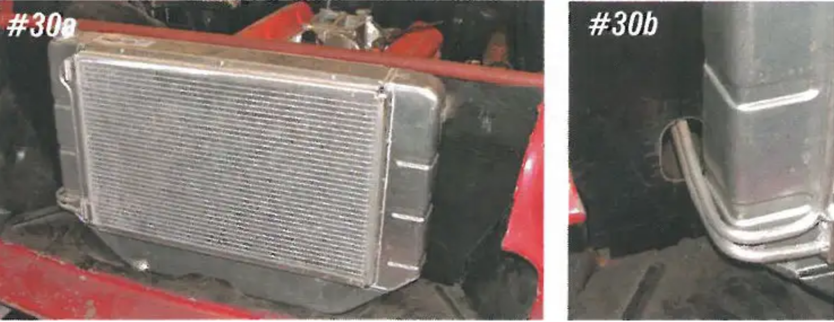
Image 30 With the radiator installed, the AC condenser can be installed back onto the radiator. The hard lines from the condenser feed through the new oval hole on the side filler.
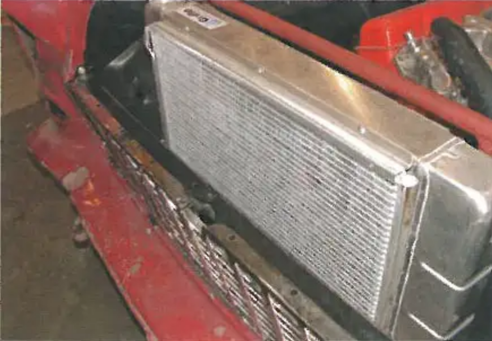
Image 31 With the radiator and AC condenser installed, the grille can be put back in place.
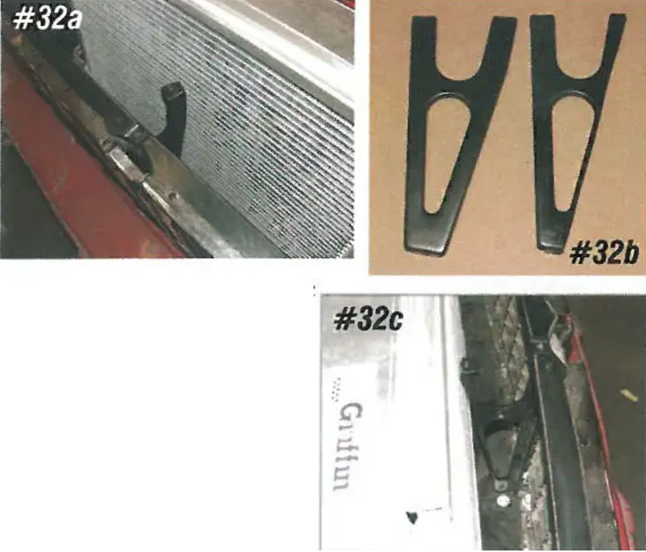
Image 32 On 1955 cars only, the grille is so flat it gets very tight between the condenser and the hood latch striker and support bracket. You will have to trim both to clear the radiator. On our 1955, the back side of the bracket had to be trimmed about 5/16". With the bracket trimmed, we now have about 5/16" of clearance.
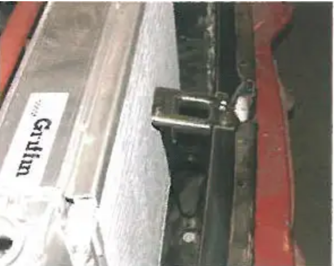
Image 33 The latch was trimmed about 3/8" to give us about 5/16" clearance. If you don't wish to trim the latch striker, an extra clearance aluminum striker PIN 54-146 may be used.
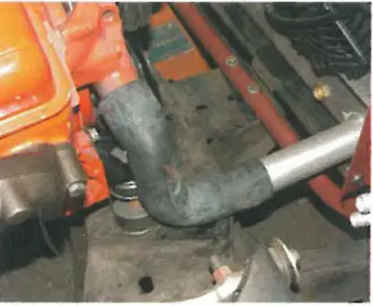
Image 34 Another great feature of the Griffin cross-flow is that it uses the stock lower radiator hose. Use PIN 57-132107-1 for the small-block engine and PIN 57-132058-1 for a big-block engine.
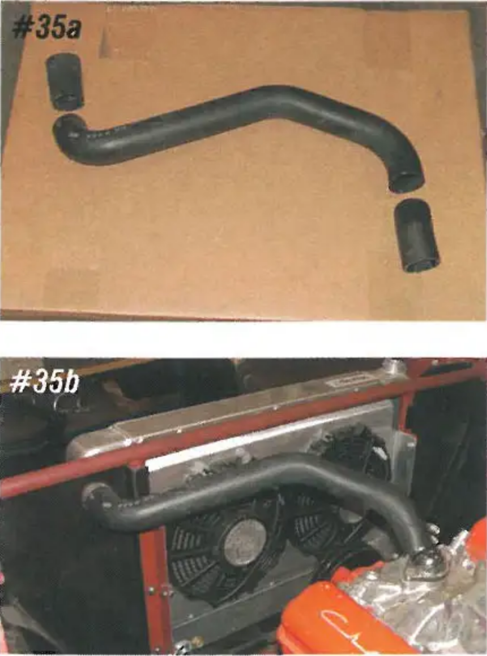
Image 35 Now for the icing on the cake; our molded upper radiator hose PIN 57-159826-1. This hose will make the conversion very clean and factory looking. For a small-block engine, trim each end of the hose by 2". For a big-block engine, trim each end by 3". We have given you several choices on how to install a down-flow or cross-flow radiator system in your classic and the clearance issues to consider when installing either type. This should help you make the decision on which installation method is best for your classic.