Sales Techs Available: 1-877-305-8966
Talk to a Sales Tech
1-877-305-8966
M-F 8:30A-11P, Sat-Sun 8:30A-9P
1955-57 Front and Rear Glass Installation
New glass will really make a 50-year-old car sparkle! In addition, installation can be done at home with no special tools. All you need is a good friend or helpful spouse and a few hours, and the job is done. In this article, we will install the windshield, rear glass, and stainless moldings on a 1955 2-door hardtop. Installation for all other body styles is very similar.
Parts List
- 57-135730-1 1955-56 Hardtop Convertible Nomad Tinted Shaded Windshield
- 57-135752-1 1955-57 2-Door Hardtop Tinted Rear Glass
- 57-135718-1 1955-1957 Chevy Windshield Weatherstrip For Cars With Stainless Moldings Around Windshield to replace worn originals
- 57-135723-1 1955-57 2-Door Hardtop Rear Glass Weatherstrip
- 57-135530-1 1955-57 Windshield Clip Bracket Set
- 57-135531-1 1955-57 Stainless Steel Windshield Molding Corner Clips
- 57-131416-1 1955-57 Lower Windshield Stainless Steel Center Connector
- 57-131417-1 1955-57 Lower Rear Glass Stainless Steel Center Molding Connector
- 57-131419-1 1955-57 Sedan Rear Glass Stainless Steel Upper Corners With Studs
- 49-08 Glass and Body Sealant
- 49-49 3M strip Caulking
Tools Needed
- 16-Gauge Insulated Electrical Wire Or Similar Size Cord
- Phillips Screwdriver
- Rubber Mallet
- Liquid Soap
Time Frame
- 4 Hours
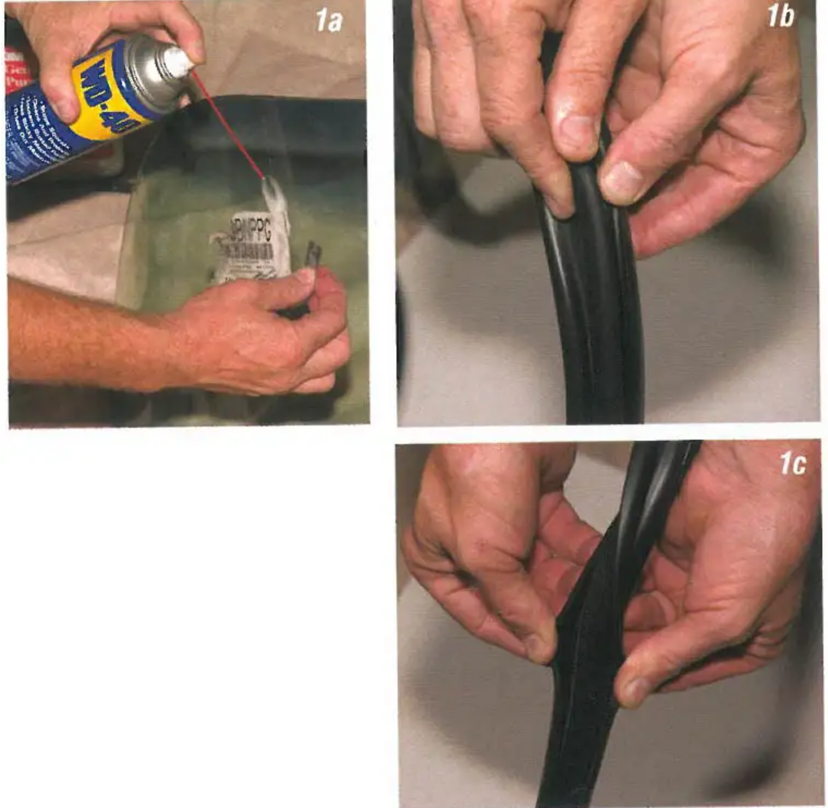
Image 1: The windshield gasket PIN 57-135718-1 fits all 1955-57 body styles except 1955 150 series sedans. This gasket has three grooves; one for the glass itself, one for the upper stainless moldings, and one for the body weld flange. These three grooves go around the entire rubber, so orientation on the glass is not critical.
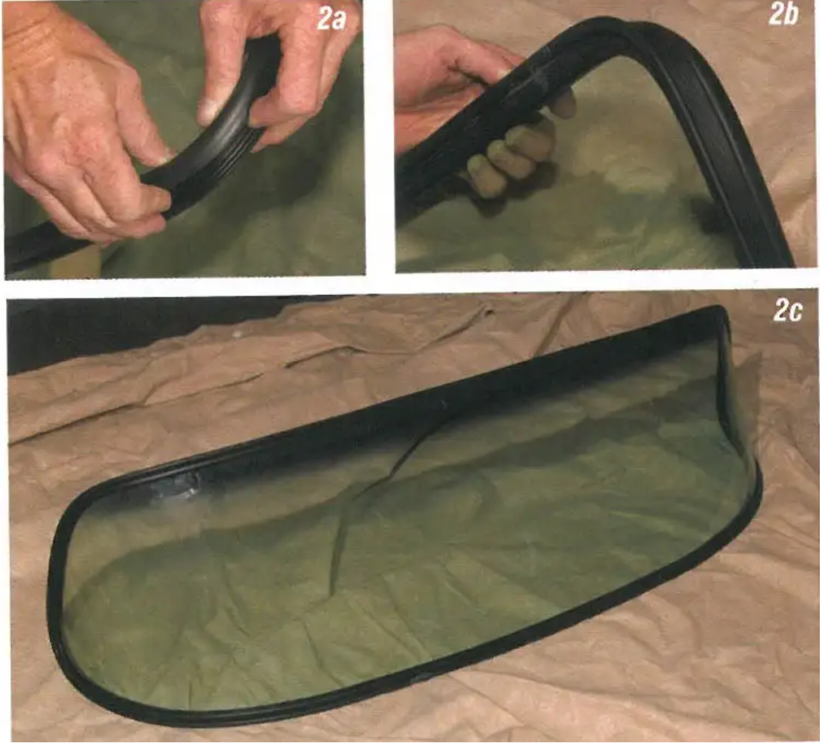
Image 2: The windshield gasket fits onto the glass with the tall ribbed side of the gasket to the inside and the groove for the stainless to the outside of the glass. The rubber gasket will fit the new glass tightly.
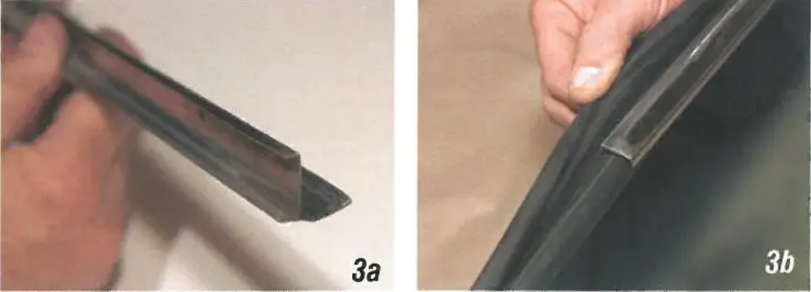
Image 3: The two upper windshield stainless moldings are installed into the windshield gasket after the gasket is installed on the glass, but before the glass is installed into the body. These stainless moldings have an angle on the rear that fits into the outer groove of the windshield gasket. It is very important to install this stainless now and not after the glass is installed!
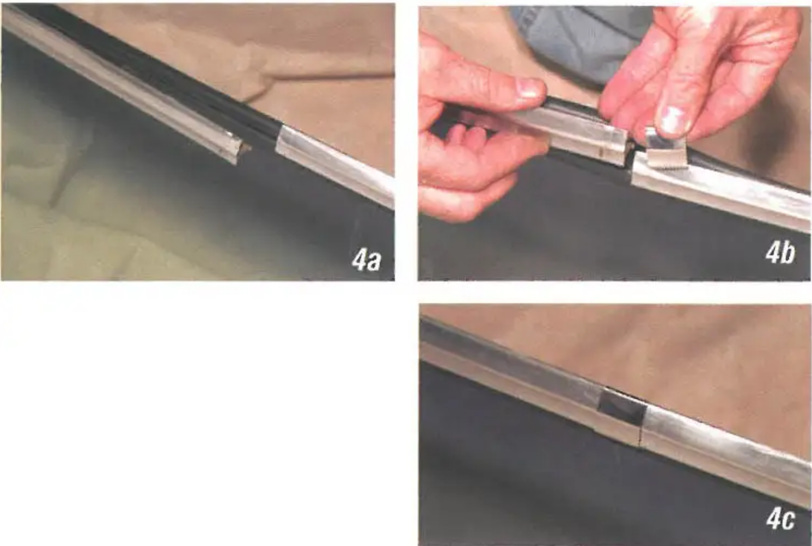
Image 4: Starting from the corners, work the stainless molding into the groove of the windshield gasket. A bit of liquid soap works great to help slip the stainless in. Once both stainless are installed into the gasket, you should have a 1/4" to 5/16" gap between the two. Install the upper stainless coupler PN 57-131416-1. The coupler can be slid onto one of the stainless moldings and then over the other molding so the gap is fully covered.
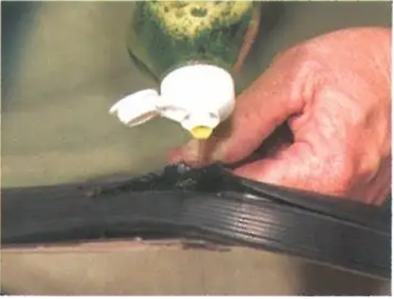
Image 5: Lubricate the outer edge of the rubber with liquid soap where the gasket will meet the body.
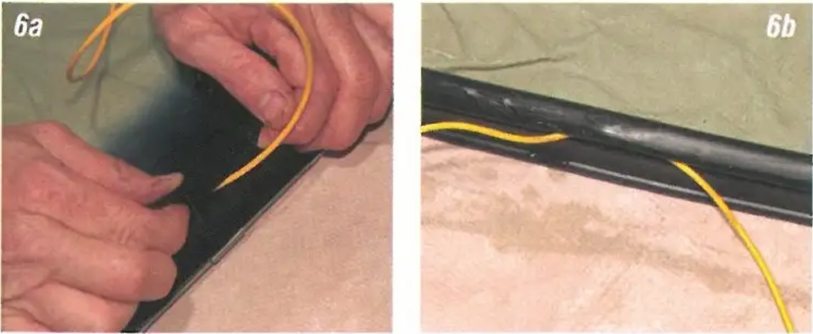
Image 6: Place an insulated 16-gauge electrical wire (or heavy cord) in the body groove of the gasket completely around the windshield, leaving a crisscross at the bottom center of the windshield.
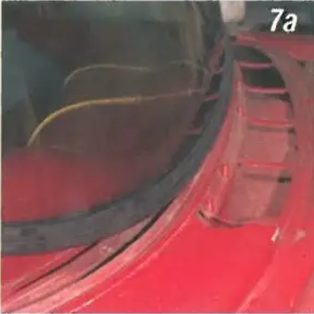
Image 7: Before installing the windshield, you may wish to run a bead of 3M Strip caulk PN 49-49 around the opening to the of any water leaks. This caulk also comes in handy when trying to seal windshield wiper transmissions to the cowl. Place the windshield assembly into the body opening so that the lower groove of the windshield gasket fits over the lip of the weld.
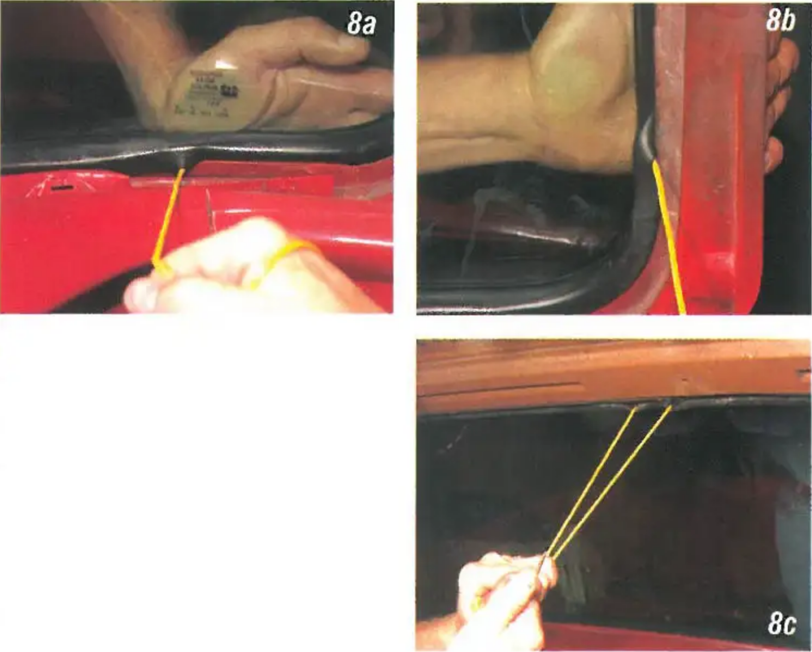
Image 8: Be certain the windshield is centered in the body opening. With a helper on the outside of the windshield applying pressure on the glass, start the wire in. The wire will the windshield gasket inner flap over the weld lip and into. Work slowly from the lower center of the glass up around the sides and across the top.
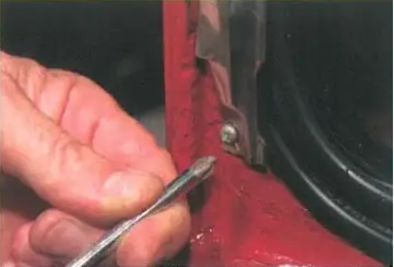
Image 9: The lower ends of the upper windshield moldings are held to the body with an 8 sheet metal screw.
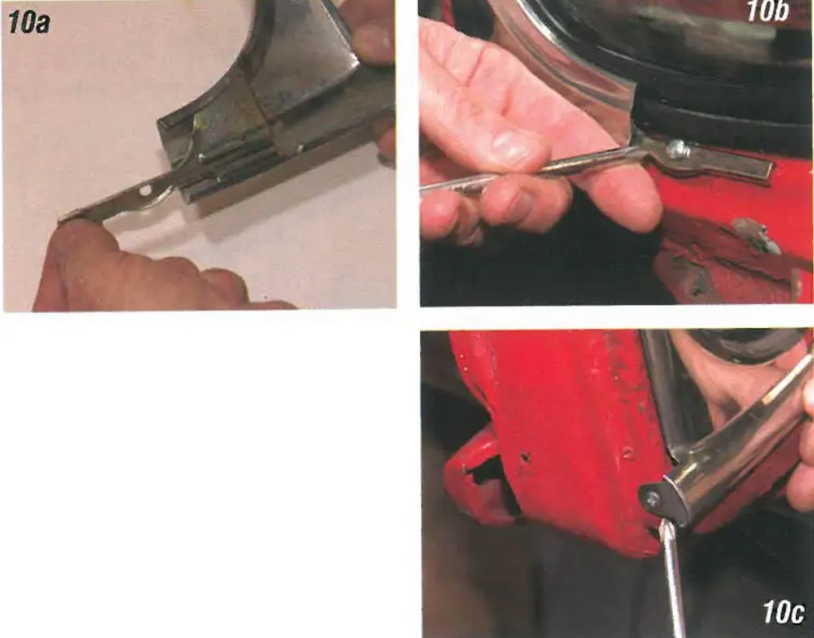
Image 10: The lower windshield corner moldings are held to the body with clip set PIN 57-135919-1. The clips are screwed to the cowl with an 8 sheet metal screw, and the rear of the molding is screwed to the back of the A-pillar with a 6 counter-sunk sheet metal screw. Be sure the top opening of the corner moldings engages the upper stainless.
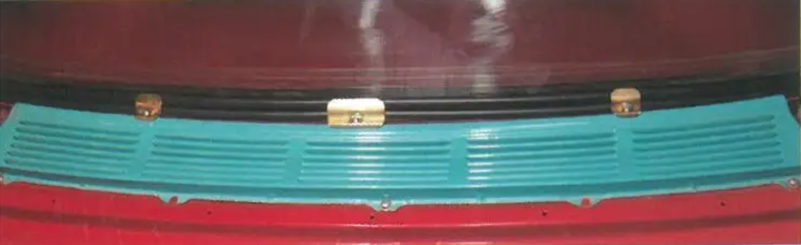
Image 11: The lower windshield moldings are held to the body with clip set PIN 57-135530-1. The large center and two small mid clips attach to the cowl screen (1955-56) or cowl (1957) with 6 sheet metal screws.
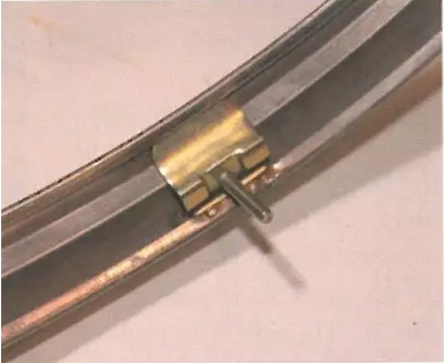
Image 12: There are two clips included in PIN 57-135530-1 that include threaded studs. These clips are the two outer clips for the lower windshield moldings. The studs fit into corresponding holes in the cowl once the moldings are in.
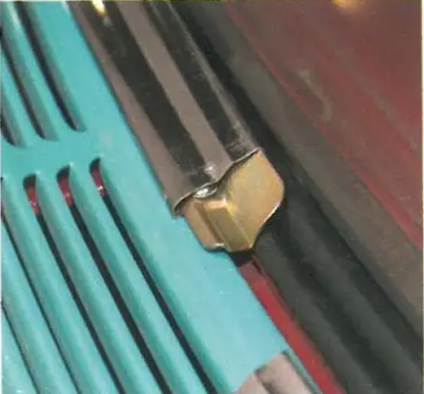
Image 13: Carefully slide the lower windshield moldings onto the clips attached to the cowl screen or cowl.
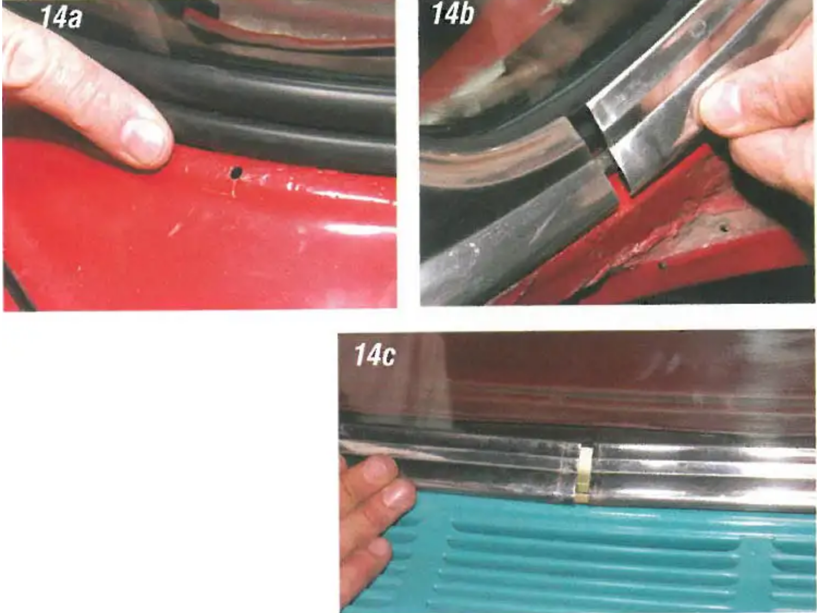
Image 14: With the lower moldings slid onto the clips on the cowl screen, bow the moldings slightly and slide them into the lower corner moldings at the same time the stud of the outer clip through the holes in the cowl. Find the studs under the dashboard from the inside and install the supplied nut and tighten. With both moldings in, there should be a 1/4" to 5/16" gap between the moldings at the center. You may even wait until this to install the lower center clip, making the installation even easier.
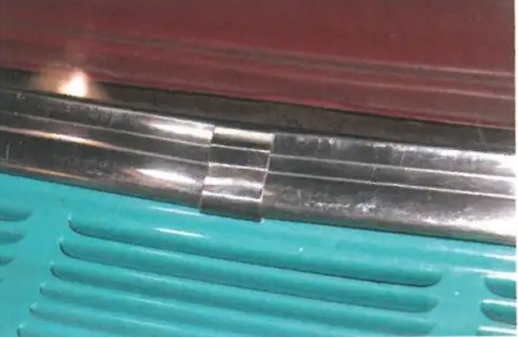
Image 15: Next, install the center lower stainless connector PIN 57-131416-1 by snapping it over the top edge of the molding first and then over the lower edge.
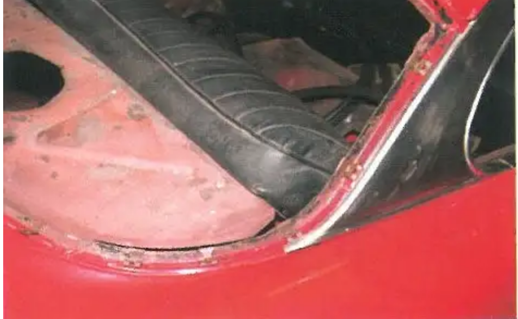
Image 16: The rear glass moldings are held to the body with clips PIN 34-20. These clips fit over the rear glass weld at designated areas around the opening. You will note where the weld is only one thickness of sheet metal, making the clips easy to hammer into.
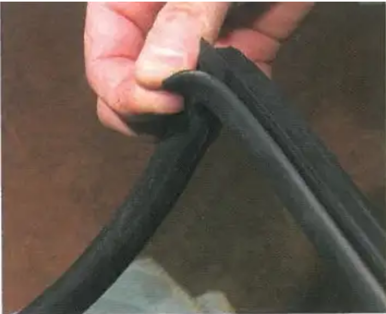
Image 17: Install the rear glass gasket PIN 57-135723-1 so that the rubber flap is to the inside of the glass. This gasket has molded corners that will match up to the upper corners of the glass.
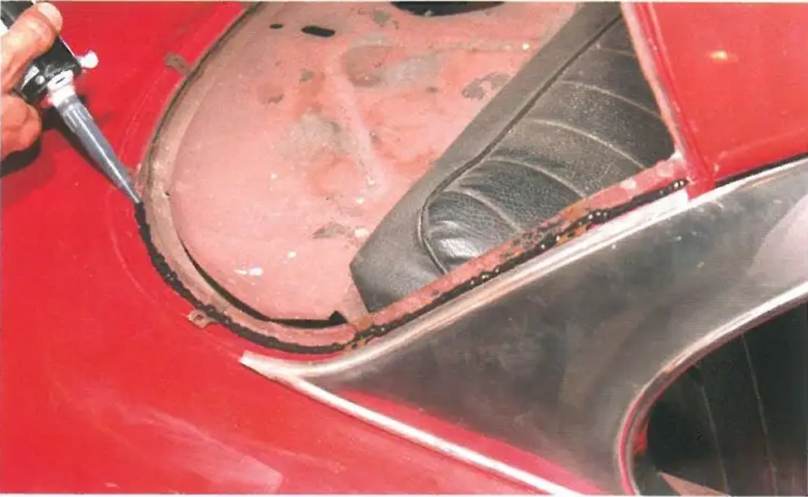
Image 18: Glass sealer PIN 49-08 or caulking PIN 49-49 will need to be used on the weld to seal the rear glass gasket to the body.
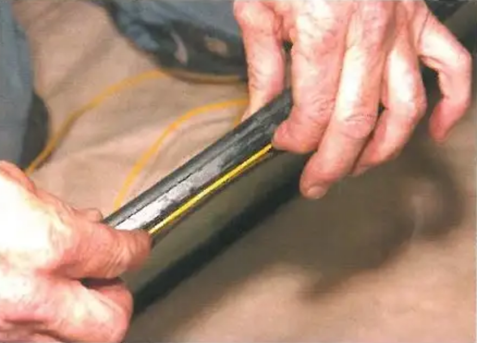
Image 19: Like the windshield, lubricate the groove of the gasket and install the 16-gauge wire with the wire crisscrossing at the bottom of the glass.
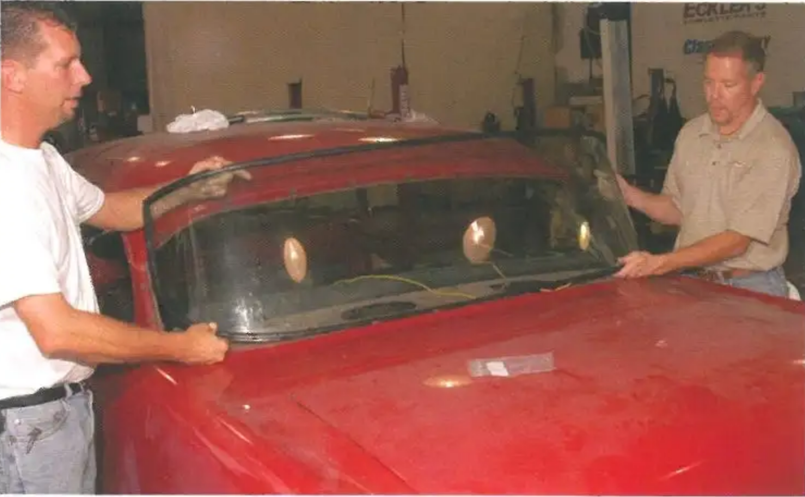
Image 20: Place the glass and gasket into the body opening so that the lower groove of the gasket is over the lip of the weld with the two ends of the 16-gauge wire centered over the tray area.

Image 21: Be certain the rear glass is centered in the body opening. With a helper applying pressure from the outside of the glass, pull the wire just as you did with the windshield.
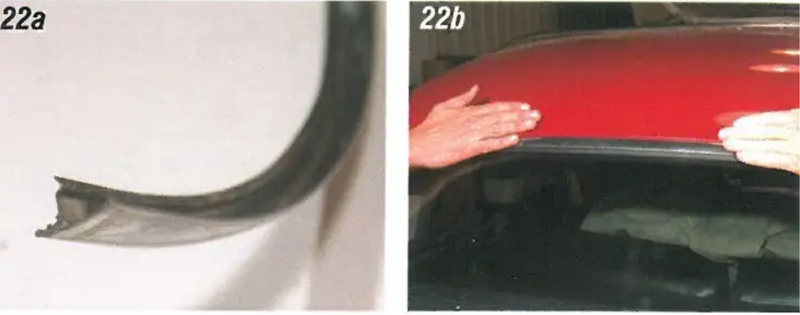
Image 22: The rear glass stainless moldings have a rib on the back of the molding that snaps between the body and the molding clips. Make sure the molding rib snaps between the body and clip and not the clip and glass. Install the upper molding first, making sure the molding is centered in the body opening.
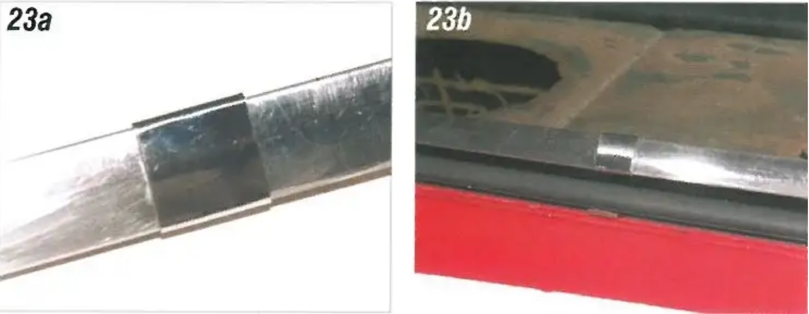
Image 23: The two lower moldings connect together in the center with coupler PIN 57-131417-1. Slip this coupler on one lower molding or the other to install the lower stainless. Center this clip up so that there is no gap showing between the two moldings.

Image 24: The upper left and right corners are connected using PIN 57-131418-1 for 2-door hardtops and PIN 57-131419-1 for all sedan cars. A small stud on the back side of the corner stainless goes through the body and is held in with a nut from inside the car.